Design Reveal: Cali Meets Traditional Part 2

Welcome back, friends! In case you missed it or want a recap, part 1 of this 9-room reveal is here. But I’m especially excited for what’s in store with this second half of our design reveal! We’ve got wallpapered walls, bold built-ins, a refinished stone fireplace, and some serious Pearl Jam appreciation. In my opinion, today’s rooms are even more dramatic than what I shared on Monday in part 1!

But I’m going to start with the most laid back of the bunch - the family room! As I mentioned on Monday, the clients hired me to really make this home feel 100% them - vibrant, fun and echoing their California roots. This was a tall order for a heavily traditional colonial style home - complete with rounded windows and lots of dentil trim throughout. This job was all about making intentional decisions big and small - doing what we could and making the rest work.

The one major update in the family room, aside from white paint which I had them do throughout, was the fireplace. The clients were on the fence with the stone - they didn’t hate it but something wasn’t right. We decided to do a limewash treatment which made a drastic difference. After swapping the mantle for a rustic wood piece, the fireplace looked brand spankin new!

Family+ROom1.jpg

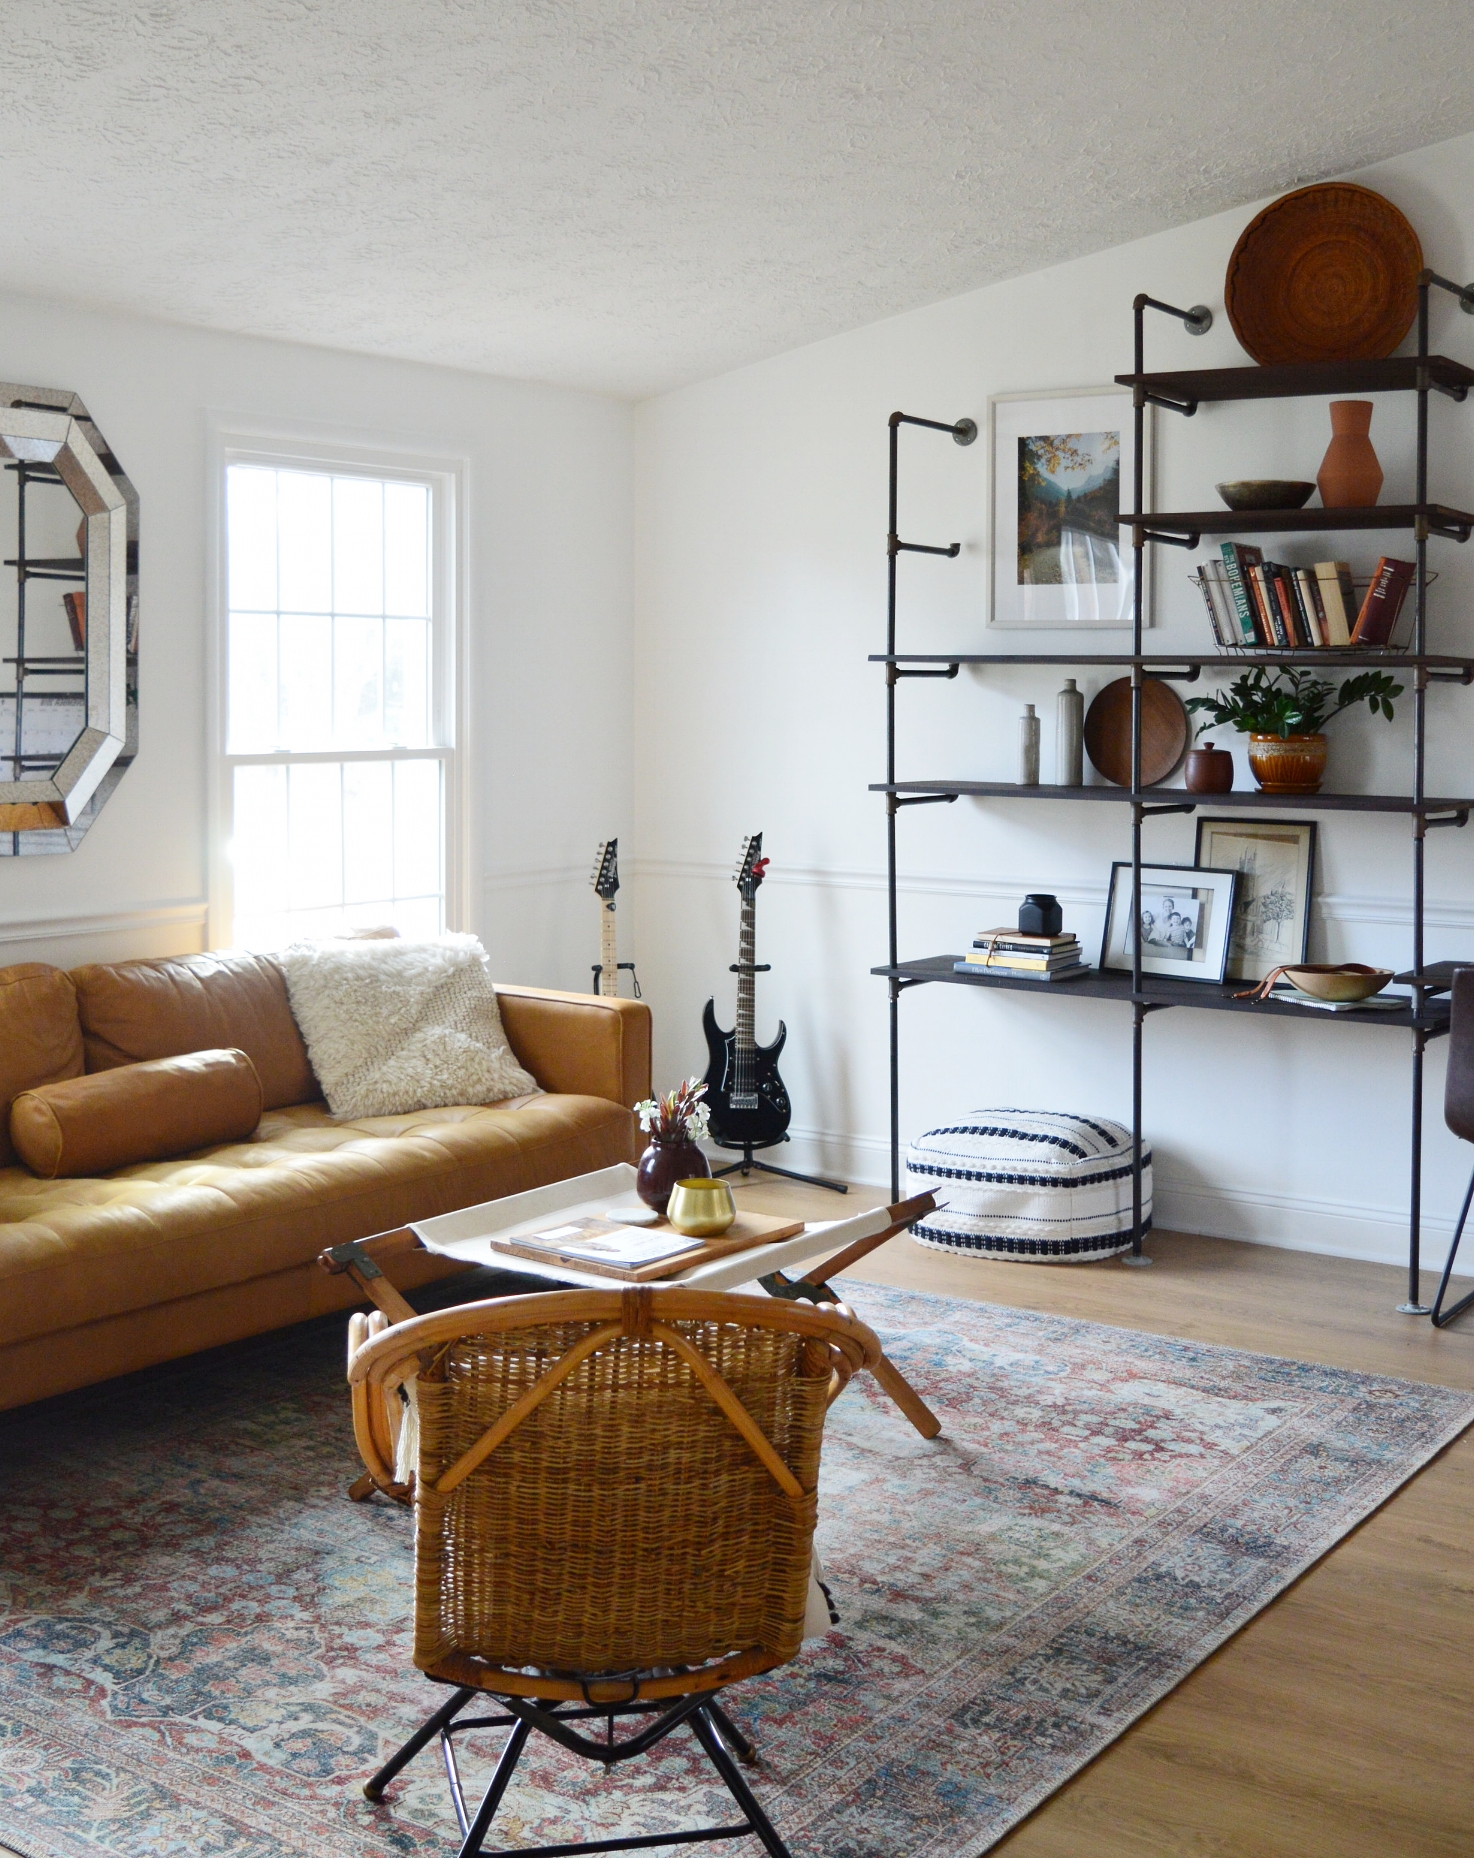
Here was my strategy with this room: Since I couldn’t do anything about the obvious traditional style of the home itself, I could at least bring in an overall organic feel with woven pieces, camel leathers, and natural dyes. I wouldn’t say organic is a style, but rather a feel, or a tone you can incorporate just about anywhere.

1.jpg

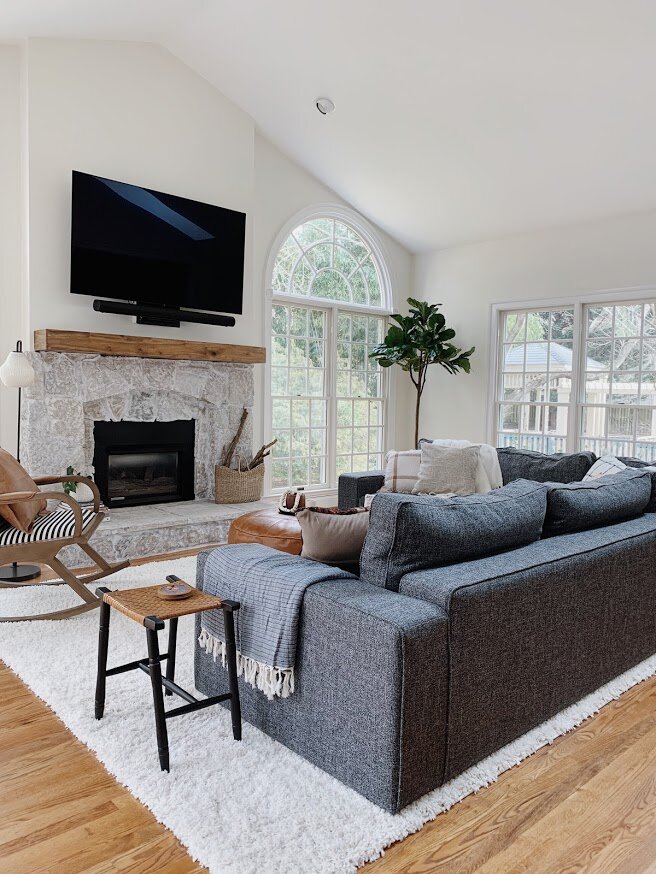
Due to the very long and narrow shape of this room, we had a custom sofa made by Interior Define, covered in an extremely family friendly fabric, (we used ‘Pepper’). Surrounding pieces had to be comfortable, durable, and interesting (without being loud). A striped rocking chair, for example, is visually interesting and balances the left side of the room, but it’s not distracting from everything else.

2.jpg
3.jpg

TVs are just not something you see in a lot of design reveals, but I’m here asking, Why not?! They are a part of most homes and I don’t like pretending they aren’t. Why designers refuse to show the TVs in their projects is perplexing to me. When styling this room with finishing details I pondered what to do on the fireplace mantle. I like a well dressed mantle just like anyone else. But nothing felt right. Books, plants, candles - any items I added just felt like clutter. I think when the only place for your TV is over the mantle, a nice clean mantle is the way to go. Instead, I focused on the hearth which balances the visual weight of the TV above.

4.jpg

I need to point out this brass and rattan sconce. The previous light fixture was a half dome that had moons and stars punched out - like a child’s nightlight. Actually, I just need to show you:

 
Matrix.jpg
 

It’s not the best picture but you get the idea. It had to go! This light below is one of my favorite pieces in the house (interpret as you will - I have lots of favorite elements in this home)

5.jpg

Is this what people did before open floorplans became a thing? A little unusual, but we worked it out and I don’t mind it at all with a bit of soft styling.

6.jpg
7.jpg
8.jpg
14.jpg
10.jpg
11.jpg

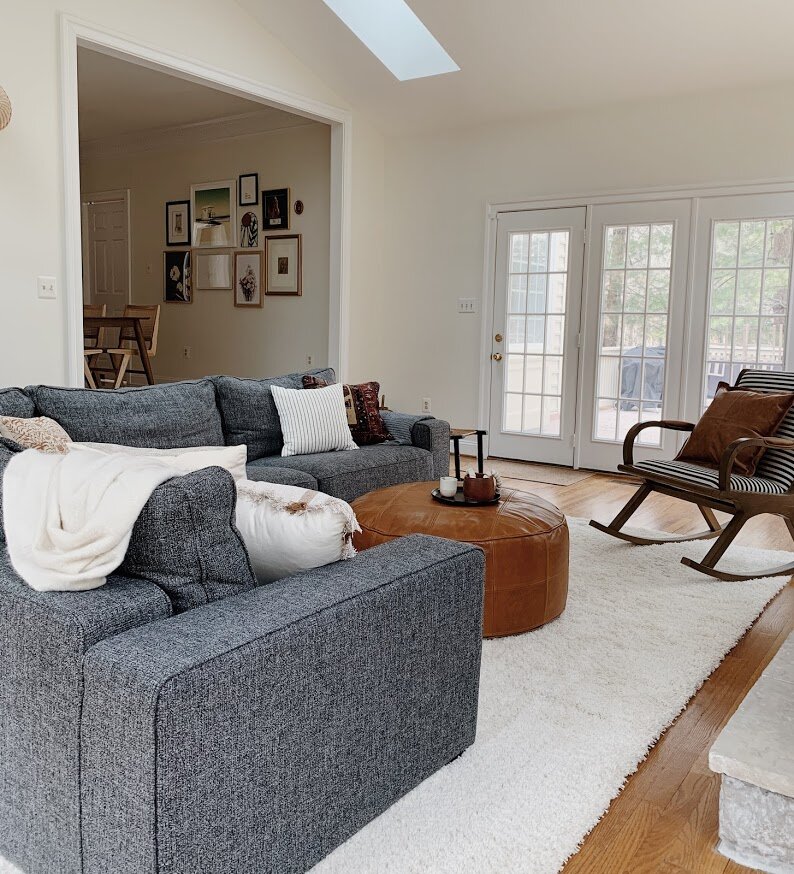
One more fireplace appreciation shot. I can’t get over how gorgeous this stone turned out. I mean, I imagined it and loved it in my head, but seeing it in real life is just so much fun.

12.jpg
13.jpg
Jaime+Office1.jpg

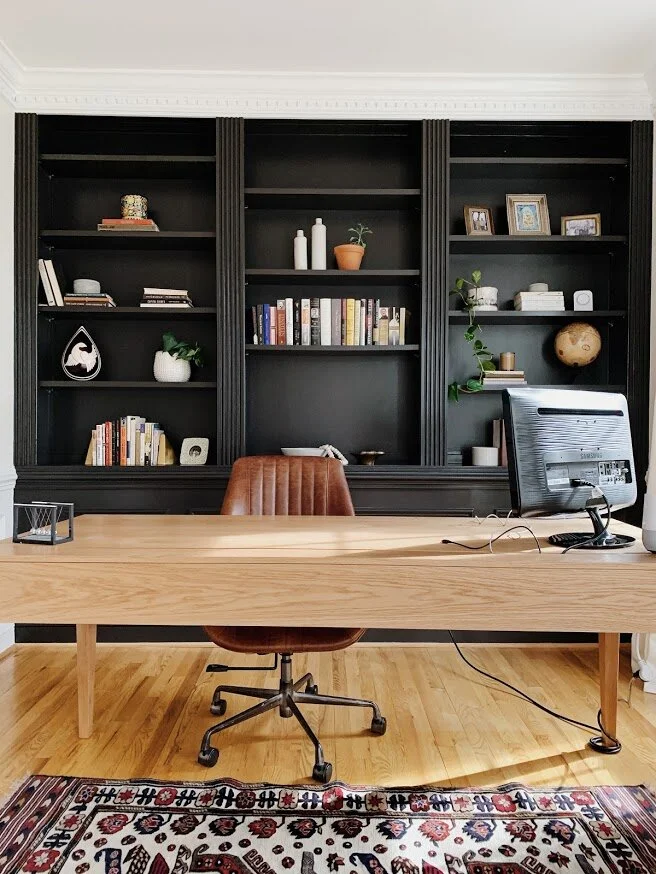
I mentioned this on Monday, but one of the best parts about designing in a colonial is getting to do whatever you want in each room! I mean, I aimed to give this home a consistent feel throughout - fun, vibrant, laid back - but how we achieved that feel from room to room is so different! The couples’ two offices are a prime example of how I created two TOTALLY different rooms to reflect them as individuals. And because they are on completely opposite sides of the home, it really doesn’t matter! Here is her office:

1.jpg

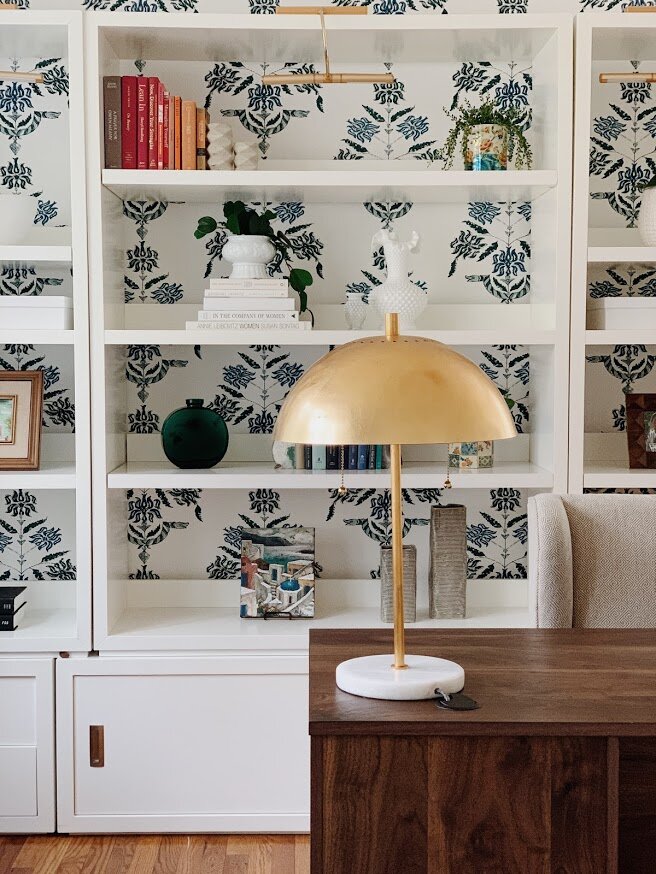
The star on all her zoom meetings? Why yes, yes she is. (No really, she told me so) We had the idea to paper this wall right off the bat, and float her desk in front. The paper itself is secretly edgy - there are snakes woven into the pattern which lend to her edgy personality. The family moved with the white base under the shelves, so I added on with additional units from this CB2 line.

3.jpg

Battery operated picture lights finish off these shelves for a subtle evening glow highlighting the various pretties on the shelves themselves.

2.jpg

If you must work from home, you may as well add a sofa to that office! A perfect lounge place to answer emails, review files, etc. A little movement throughout the work day feels like a luxury these days, and since she had the room for it I wanted to give her a second option during the work week.

4.jpg

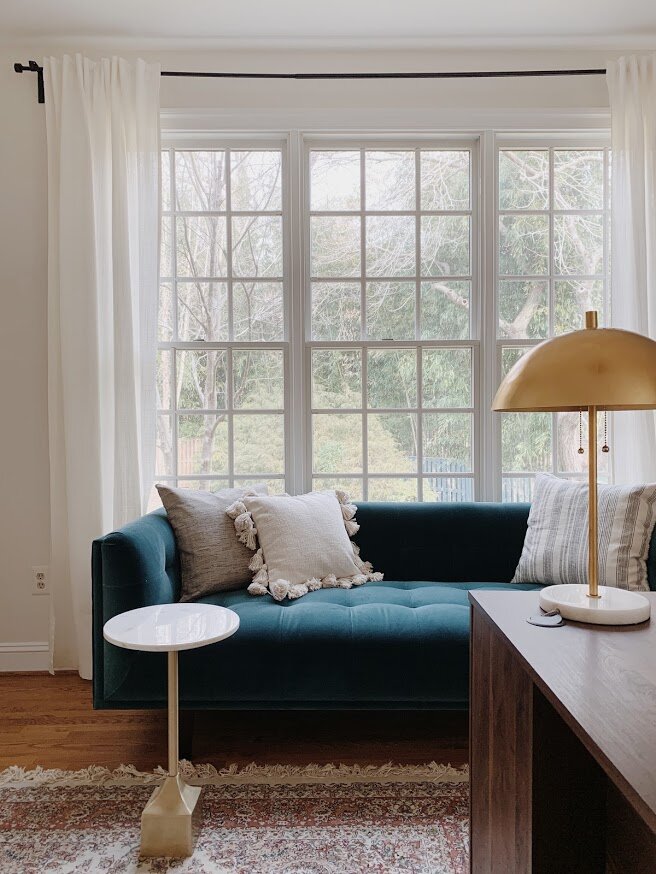
Not once did I compare the blue velvet of the sofa to the blues in the wallpaper. I didn’t need nor want them to be a perfect match, and I love that the sofa has a very subtle green tone.

5.jpg
6.jpg
7.jpg
8.jpg
alex+office1.jpg

Like I said, the two home offices are polar opposites! Where I went soft and feminine in one, I went hard and bold in the other.

6.jpg

If I had to guess, I would bet his coworkers appreciate his zoom meeting background, too. Even if they aren’t outright saying it. ;)

2.jpg

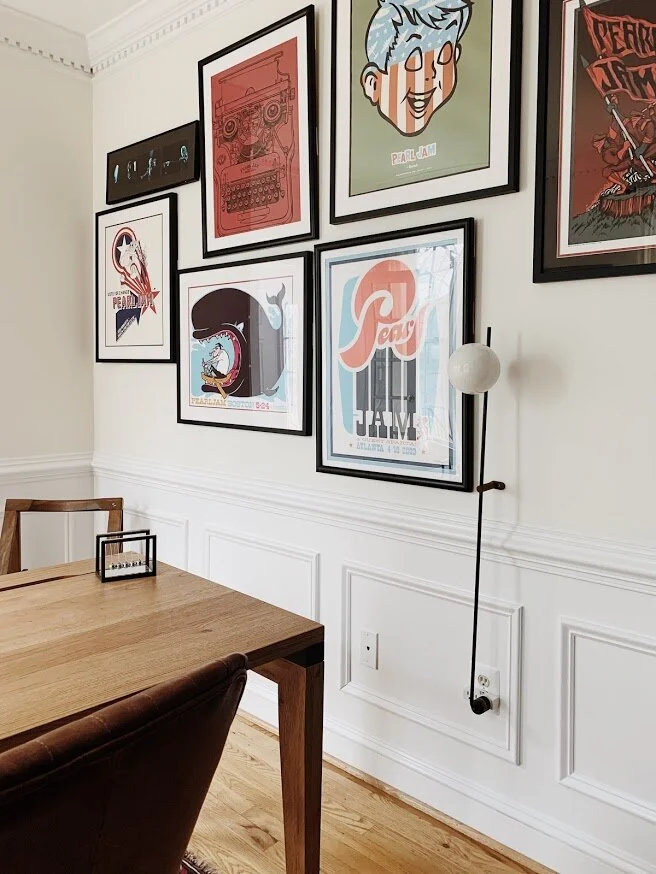
True story, this space was designed and complete before one evening when I got a text from the clients asking if there would be anywhere to add their collection of Pearl Jam concert posters. It was like meeting them again for the first time. A shared obsession with one band?! I was THRILLED to use these pieces and promptly had them frame their collection at Framebridge and played with an arrangement that would suit this office. I had actually picked that pole wall lamp before knowing about these pieces, so it was really fun to work the gallery wall around that piece. I am still beyond words excited with how this turned out!

3.jpg

Sophisticated meets rock n’ roll? Oh yes. Please and thank you.

4.jpg
7.jpg
1.jpg
Kingsley+Room1.jpg

Hard pivot now from Pearl Jam’s shrine to adorable childs room. Hope you’re hanging on tight, lots of twists and turns in today’s reveal! From black and bold to…butterflies!

3.jpg

I need to stop us here really quick to say, I think we can all agree the wallpaper MAKES this room. Well guess what? I was utterly stuck on wallpaper. I was chasing after big bold florals, enchanted forests and everything in between. But nothing felt right. I wanted a wallpaper that would suit this 5 year old little one as she is now, and when she’s a teenager. Everything I was finding seemed either too nursery, or too sophisticated. Fast forward to one of several afternoons I got to spend with a teen from our church over the summer, when her and her brother would come over and literally just play with my kids (and the other 234 kids in our neighborhood) for a few hours. I asked if she’d help me with this room if I paid her for her time, and within an hour she sourced THIS PAPER. It knocked me right over. So, huge shout out to my friend, Meredith Jolly! Thank you!!

1.jpg
10.jpg

The velvet teal bed felt like an unexpected pairing with this wallpaper, which made it feel just right. I really got into this groove of making brave choices with this home, and their daughters bedroom was no exception. Don’t overthink design, friends! You never know what you’ll uncover.

9.jpg

The rug felt like another unusual choice - the bed doesn’t really match the wallpaper which doesn’t really match the rug - and it all totally works and is glorious.

6.jpg

I wanted to finish the room off with more neutral pieces - you don’t really see the winks of black and brown in the wallpaper until you layer those colors in and it hits you.

11.jpg
5.jpg
7.jpg

I think if happiness were embodied in a physical room, this is what it would look like. It’s just pure delight in here!

8.jpg
2.jpg

I can’t believe that’s it for this reveal! Or is it? Good news, the family has just hired me to work on the master bedroom with a quirky adjoining side room, and their finished basement. Who knows what we’ll get into but I’m all in. After these rooms I am sure it’ll be very exciting, indeed!

Thank you so very much for coming by! Every hit to our website helps our little business so much, so we sincerely appreciate you taking the time to visit on our very special reveal days. It truly means a lot! Have a wonderful rest of your week!

Chelesa.jpg

SMH E-Design Projects in Progress!

Hi Friends! It’s been a little while! I realized when catching up with some friends I hadn’t seen in a while that I’ve neglected sharing StyleMutt Home design work on here in a big way! I have to be honest, if I don’t have a final reveal to share with you guys, I don’t really know what to share. The truth is I am up to my ears in design projects but have very little hope of seeing many, if any, of the jobs completed. For one thing, many clients are not local. This presents the hurdle of coordinating travel, (and paying for it), to go take pictures of any projects that are actually completed according to the design plan. The design plan is another hurdle! Even when I deliver a design within the clients budget, with all the tools to make purchasing the items a cinch and an annotated floorplan indicating where every single item goes, many jobs don’t get completed exactly according to the vision. And as a homeowner I TOTALLY get it. Financial ‘surprises’ come up and sometimes the budget you had for fun stuff, (think art, pillows, a pretty rug or lamp), goes to not-so-fun stuff. This is the number one reason why more jobs don’t ever make it on here, and even though I absolutely understand it as a homeowner myself, it’s a tough reality to face.

This is, indeed, a creative job. It’s a profession that attracts creative personalities! Creativity has always been a part of my life in a very tangible way, and my favorite part of the creative process has been seeing a vision come to life. It just so happens that in this particular creative field of work, I very rarely see the vision come to life. I’m working on some ideas to improve the process, but I have had to really come to terms with that and press forward with my best effort. While this has been an unexpected challenge, I am so incredibly grateful that I have the opportunity to work and make some income on such a flexible schedule. I feel like I am able to be ‘all in’ with my kids and be available and present in their lives, and I am able to work around our family time. What a gift!!! So, despite some unexpected challenges with the job, it is still a dream come true.

And despite not getting to share as many finished projects with you as I would love, I’d like to make a better effort of sharing and celebrating project progress! I absolutely love putting design concepts together for our clients and since that’s what I am doing every week, I figured why not share them with you! So here we go; A quick breeze through of some recent design concepts that I’ve completed since New Years! For each project I create a design board that is more or less a ‘collage’ of the pieces that will fill the room, a floorplan that maps out where all the items will go, and a 3D rendering of the design as it would look in their own space. In addition to these, I also provide a complete shopping list that our clients can use to conveniently purchase through the pieces in the design. A single design project can take from two weeks to a year, depending on the scope of the job!

Project 1

Project goal: Transform the over crowded space with more comfortable pieces that will enable this basement to function as a lounge area, colorful play room, and small workspace.

Neesha's collage.jpg

Project 2

Project Goal: Use client’s existing sofa, rug and art to create a comfortable living room with surrounding pieces that still allow flow in this very narrow room.

Annies collage.jpg

Project 3

Project Goal: Create a modern, yet cozy formal living room suitable for entertaining.

Keristen Collage.jpg

Project 4

Project Goal: Work with the existing kitchen to blend the space in with the rest of the home - modern yet casual pieces that are warm and inviting.

Keristen Collage 2.jpg

Project 5

Project Goal: Create a very minimal yet warm formal dining space. Client needs space for their piano and favorite pieces of art.

PicMonkey Image-5.jpg

Project 6

Project Goal: Transform this sunroom into a relaxed but chic office and lounge space. Specific request for asian inspired art, shelves for books, and a chaise lounge to read.

PicMonkey Image-6.jpg

I have had such a blast with these projects over the past two months! In addition to starting these since we rang in the New Year, I also now have 4 additional projects that are on track to be completed this Spring. I’m feeling hopeful, guys! Fingers crossed there will be some really fun fresh design projects to share here soon! I do have a little refresh I worked on in our basement ready to share, so stay tuned!

Thank you all so much for stopping by!

Chelesa.jpg

Design Reveal: Our Kitchen Reno!

Hi, Friends! As it turns out, I’m a terrible updater - generally speaking, AND especially during a renovation. So to catch you up in one sentence - We renovated our kitchen this past fall and it’s done. Welcome to the reveal of the project! LOL

To be honest, as detail oriented as I am during a design project, I find the thought process of managing so many details to be tiring! I love it but I don’t feel like I have much energy left to talk about it. I know. I really really have no business being on a blog. Good bloggers share step-by-steps and pictures along the way. Mediocre bloggers share Before and Afters. Bad bloggers just share the After. It’s taking everything I’ve got to be mediocre today and scrounge up some Before and Progress shots I got during the reno. Worlds Okayest Blogger, right here, folks! Hah!

So let’s get down to it! The biggest change we made was taking down the ‘L’ shaped wall on the right:

Then

static1.squarespace.com.jpg

Process

reno 3.JPG
reno 4.JPG

Now

DSC_0531.JPG

We have lived in this house for 8 years so we didn’t come to the decision to knock that wall down flippantly. Over time as our babes got older we realized how much happens around the kitchen. And the more life that was happening outside of that ‘L’ shaped wall, (think homework, test studying, recapping the day, dancing, playing), the most closed off the kitchen was starting to feel. I think living here for so long before diving into this project really helped us make big decisions about what would make the most sense for us and our family and most especially, this house.

DSC_0533.JPG

And by this house, I mean a 1982 generic build. I adore this house but since it’s a basic spec home, (one of 5 different models to choose from in our neighborhood), it just doesn’t have a strong personality. There are no architectural details driving the style of the house - arched openings, thick window casings, stuff like that. As a designer I tend to pick up on these details in my clients homes and play them up in regards to the client’s personal taste. But having a house with no particular personality is a double-edge sword. In one sense, you’re not beholden to any particular style of design. But on the other, adding any strong style elements stands out like a sore thumb. In looking at kitchen ideas I was really drawn to some modern wood kitchens ive seen - no hardware, just a simple lip. This style I was drawn to would have required renovating the entire rest of the home in order to maintain some sort of consistency. As it stands now, we still have work to do around the rest of our home so the kitchen doesn’t look like the ONLY updated area. But we’ll knock things out over time and as we have funds.

DSC_0536.JPG
DSC_0538.JPG

We went with Allen + Roth shaker style cabinets from Lowes, and Q Quartz counters from Granite Center, a local counter warehouse in Sterling, VA that we would highly recommend to any locals in the market!

DSC_0541.JPG

With so much white going on I was particualrly excited for some dramatic contrast! After scouring the great world wide web for the sleekest black pulls I could find within budget, I landed on these pretties I found on Etsy, (they came all the way from Bulgaria)! There are various sizes to choose from and we went with the 5 5/8. For this particular kitchen I wanted to use one consistent pull for every cabinet and drawer, and this size was the most versatile across the board.

DSC_0547.JPG

The island color is Salamander by Benjamin Moore, and is amaaaaaaazing in person! I wanted a dark teal color and this was the perfect green-blue that I was imagining! Although our kitchen remodel is ‘safe’ and basic white, I always think an island is a great opportunity to add a big ol’ ‘POW’ for just the cost of paint. And I love the color with these rust and marigold mums that some dear friends gifted us.

DSC_0539.JPG

Lighting was hard for me when designing this space! We were pulling a lot of track lighting out, but trying to fit new lighting in, and all in a shared open space! I wanted the kitchen sink light, island pendants, and dining table fixture to all be different but flow well together. For me that was a challenge! I was constantly comparing sizes and scale and photoshopping lights together so I could see them side by side.

DSC_0549.JPG

After sending out an SOS on Instagram for some lighting source suggestions, I was introduced to Sazerac Stitches! I absolutely loved their style - it was EXACTLY what I was looking for! This is the Drew 6-Light fixture and it’s the perfect blend between industrial and modern that I was looking for.

DSC_0573.JPG

The island pendants are from Poly + Bark, and the stools are AllModern.

DSC_0563.JPG

Designing a kitchen was an absolutely amazing experience, but I am SO grateful my first time could be on our own home! Throughout the process I just kept saying, “You don’t know what you don’t know.” I asked a ton of questions and really stuck around during the process so I could understand it all. One thing I am beyond grateful for is that our contractor is a trusted neighbor and friend. He talked through every little decision with me and when I asked for his honest opinion he gave it. I honestly learned so much from him as he was willing to teach me as he worked.

The image below is my first attempt at a 3D kitchen rendering. DON’T zoom in, I beg of you. LOL! It’s laughable, but it really helped me visualize the main pieces in the space.

39957.jpg.png
DSC_0550.JPG

While you’re here why don’t we take a gander at the living room! That is, afterall, one of the main reasons we took down that ‘L’ shaped wall to open things up in the first place! So much life happens in this space and now we can share in it from the kitchen, too. Don’t get too cozy with this set-up. Christmas is just up ahead so things will be shifting here and there to make room for a tree soon!

DSC_0554.JPG
DSC_0564.JPG

Nothing much changed in here from our pre-reno layout, but we did incorporated a new rug that pulls from the color of the island! It’s so fun and vibrant and happy - a perfect backdrop for this space. A huge thank you to Loloi rugs for working with us! This piece is from their Loren Collection.

DSC_0569.JPG

It still feels surreal that this is our home - that we get to live here! We just absolutely love it. There are still small things to wrap up and touch up but for now we are excited to lay down the brushes and nails and just hang out and rest together. Our hearts are spilling over with gratitude for all that we have - each other, our family, friends that are like family, this home…it’s all so much more than we deserve or could have ever hoped for.

We wish you the very happiest Thanksgiving tomorrow! You friends are on my list of things I am incredibly grateful for. Thank you for making StyleMutt Home such a fun place to share this work.

Chelesa.jpg