Guys. (well, mostly gals). When I saw this piece on Craigslist recently I tried to do a handspring and almost twisted my ankle. No joke. That's how much I loved it, had to have it, wanted it yesterday.

Please note that is NOT my garage, it's the seller's pic. Not that I have any right to pass judgement on a messy garage... Anywho, pretty epic piece, right?!
And after some TLC and socialization with the world outside of a garage, here's our beauty after!

This makeover had it's highs and lows and I'm not going to spare you any graphic details. Consider that fair warning!
To start, I texted my go-to-gal, Cate, and shared an up close pic of this piece's freckled veneer. That is, indeed, veneer - but it's in SUCH amazing condition that I knew it could stand its own. However, it had freckles! It looked like my arms and legs in July - COVERED in freckles! Fine on people, not furniture. Cate suggested dulling the freckles by rubbing the piece down with a gel stain, and it worked!!

That Cate; she's one brilliant chick! Love running things by her for her opinion and advice. She never fails. Seriously, I think she's batting 1,000 - every pitch I throw she swings a home run idea!
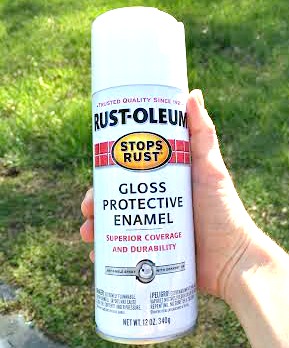
After I stained the body, I was ready to tackle the shelves and cabinet door. I wanted glossy white but was really not interested in using my highly praised Glidden Trim Door Furniture paint. I love that stuff but it's seriously thick, and trying to get it inside every corner and crevice was going to take a lot longer than I have patience or time for. So I tried this:
Gave all drawers and door a coat of Rust-Oleum Paint & Primer In One. Worked beautifully as a solid first coat.

Here comes my favorite part - I tried for the first time Rust-Oleum's Gloss Protective Enamel, (in white), and it's like the SPRAY FORM of my beloved Glidden paint! It's oil based, sprays even and lays thick. When all pieces were dry, they were so smooth and solid - you couldn't scratch if you tried.
Luckilly, I had an opportunity to test this most amazing paint after this happened:

Some bird out there is patting the feathers on his back for this near bullseye. Don't set pieces out to dry under a large tree, folks. Lesson SO learned! To clean, I ran a high pressure hose over this while simultaneously scrubbing with a thick bristle brush. I figured I would have to start from scratch and re-spray this piece. What a pleasant surprise when the water just beaded up and trickled right off and the bristles made absolutely no damage to the finish at all! I am so pleased to say it is now squeaky clean and Rust-Oleum has made me a die-hard fan for life! Amazing product, Rust-Oleum; bravo!
Last to tackle was the awesome custom hardware. This piece would have no other hardware. There are wooden 'notches' made just for these pulls to fit around, so it's already a perfect marriage. They were pretty dirty and dingy, so I cleaned them up and gave them all a coat of Rust-Oleum metallic gold spray paint. They looked a little plastic-y afterwards, though. So, I grabbed a can of dark wax, (by Annie Sloan, but you can find dark wax in most hardware stores now), dragged a thick artists brush around in the wax, and dabbed it into the crevices on the hardware. I covered each piece thoroughly, then took a paper towel and just 'blotted' to remove any excess wax. I let the wax cure for a day before adding the hardware back on the piece
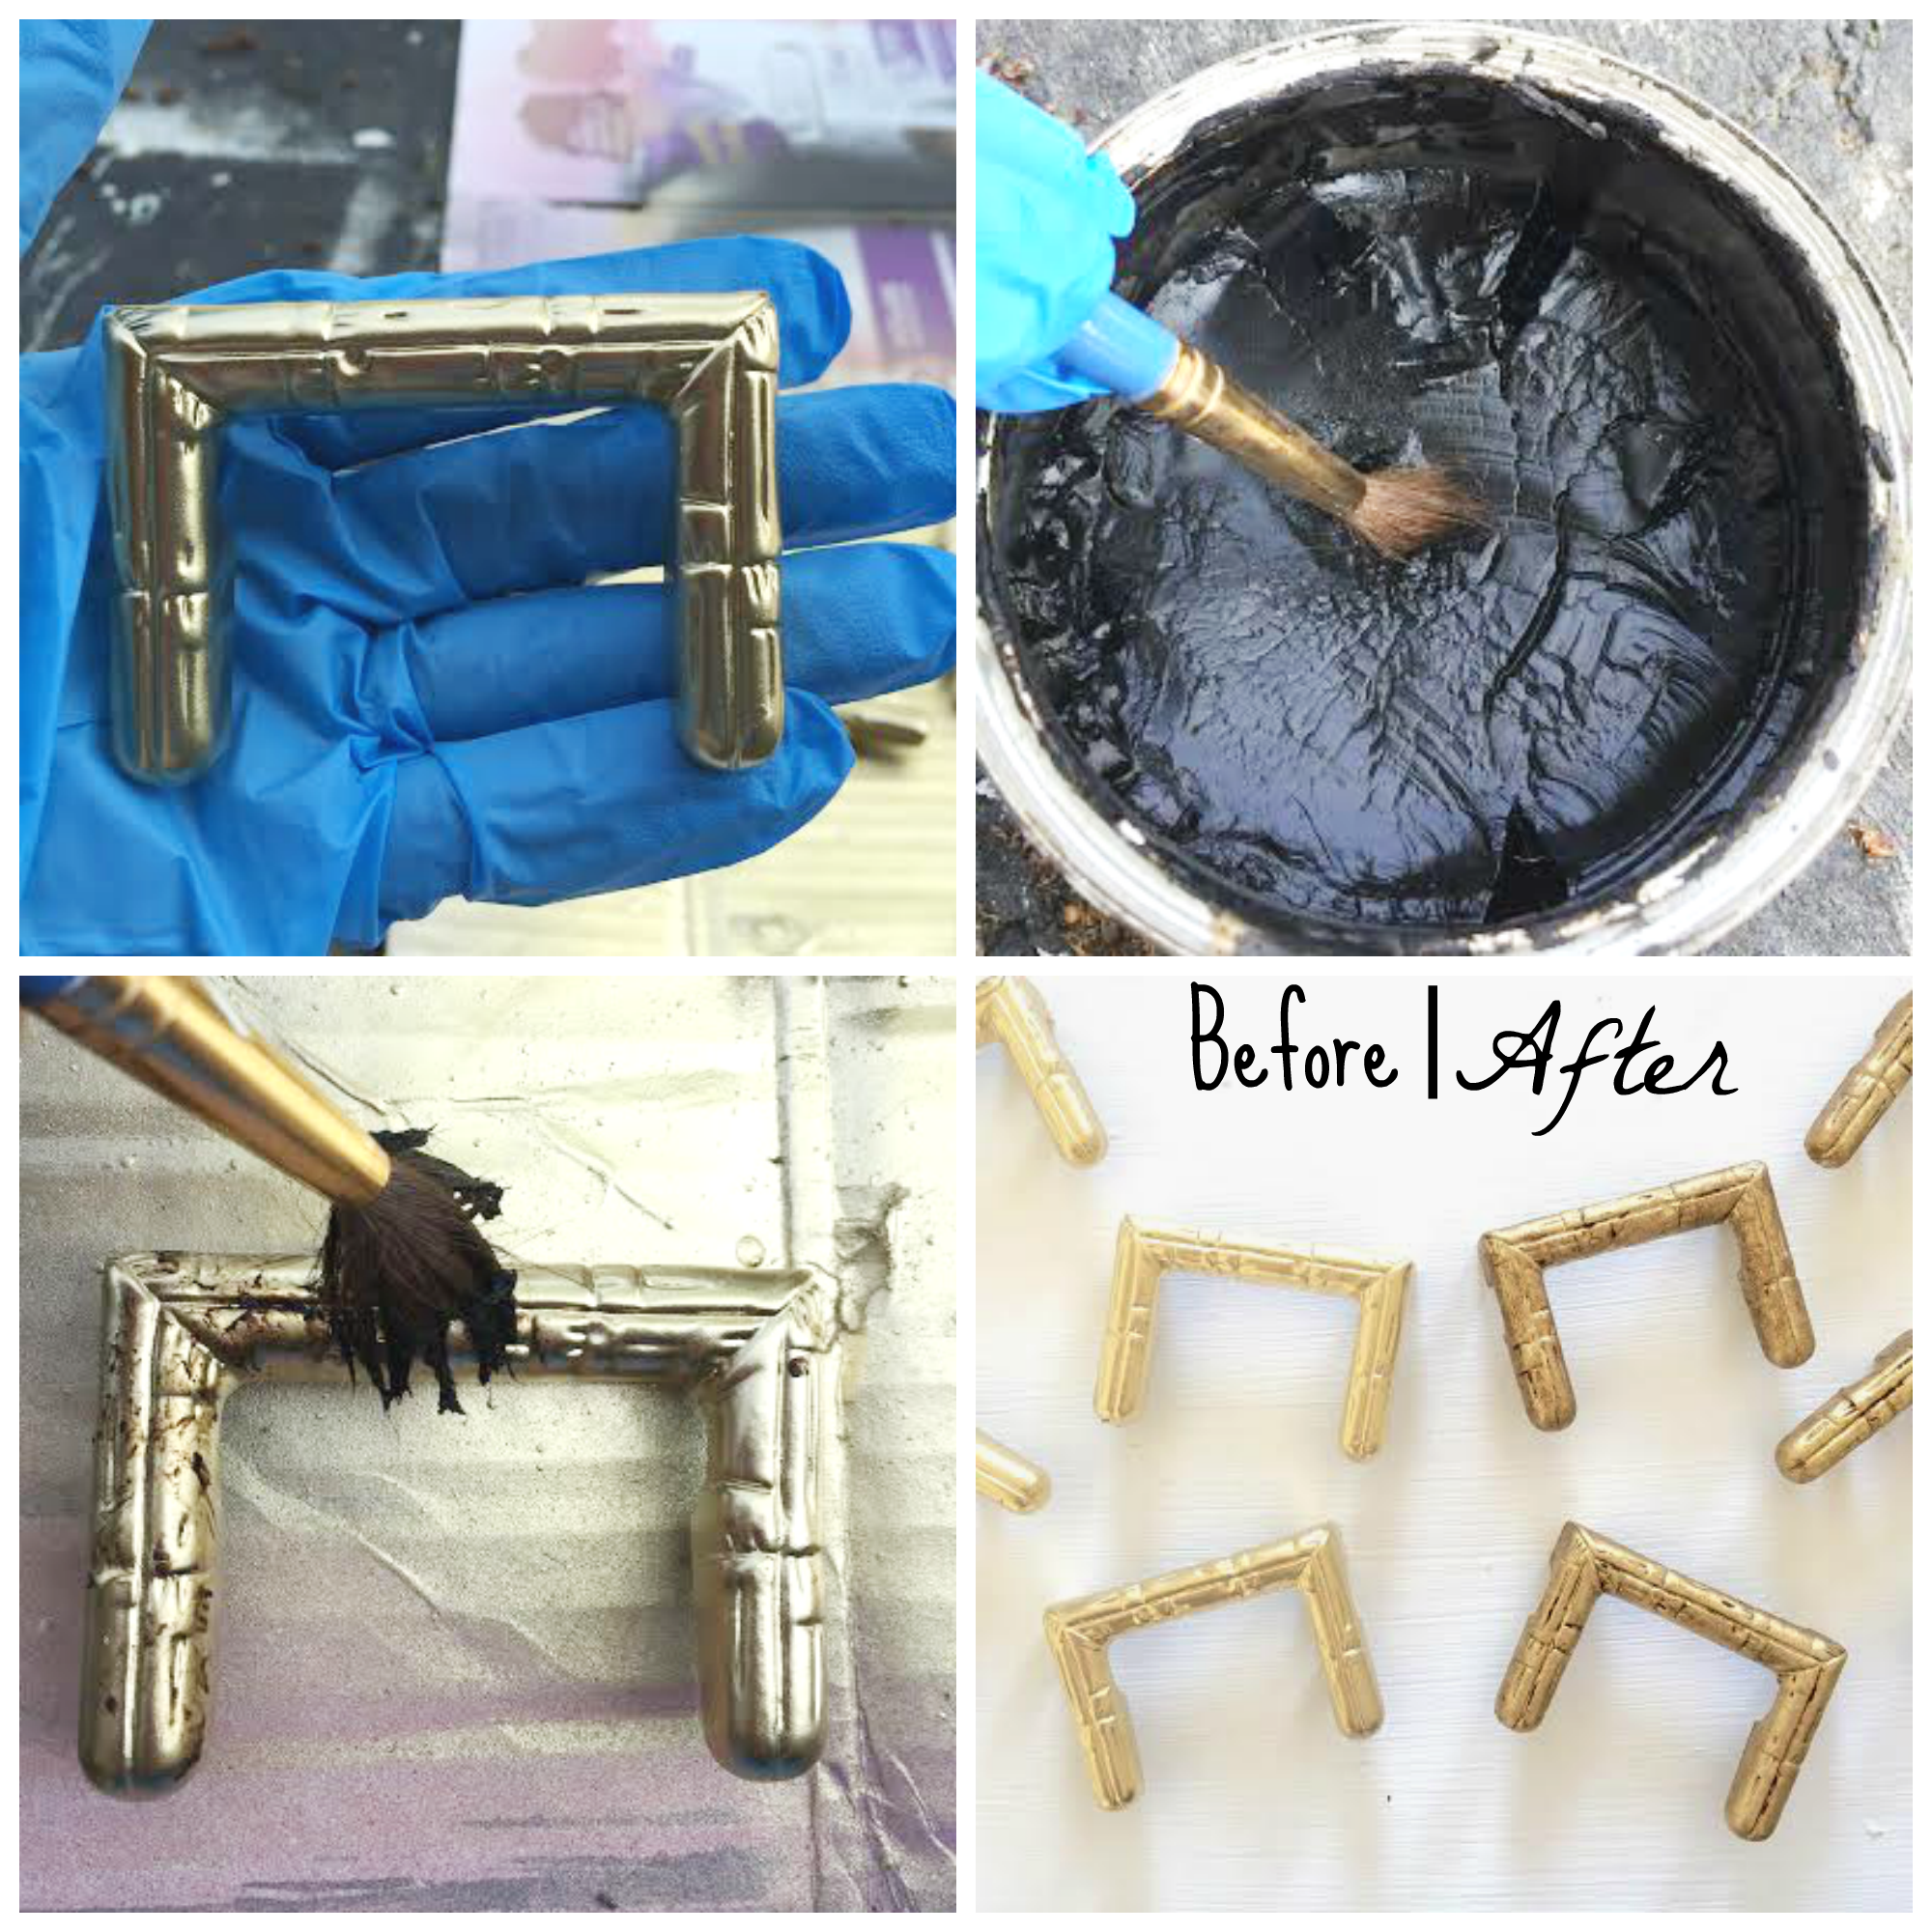
Love the authentic look that the wax adds! Beautiful, isn't it!


Cleaned up nice didn't it. ;)


So excited with how this piece turned out - it made a marvelous journey with a little crap along the way, but all the best journeys have their fair share now don't they.
This pieces is now available for sale in the DC metro area!
$675
69"L x 30"H x 17.75"D
You can email me at chelsea@stylemutthome.com if you have any questions or want to snag it!
Thank you all for stopping by!