So, honest question here. Does anyone else feel like the weeks leading up to Thanksgiving - which is my favorite holiday ever - drag on forever? We're only four days in to November, and I'm so ready for pie and family time!
Thankfully, this week, I had Britt's colorful and gracious space to look forward to! I hope it is the same "bright spot" for many of you!

It's the kind of home that I just want to dive in to. It could be on the pages of a magazine, and I may still try to dive in. It's dreamy! And feels totally personal to Brittany and her husband. Her better half even picked out that couch himself & had it upholstered!
From Brittany:
“Vintage shopping has played a big role in developing my own personal style. Old stuff naturally gives a home character, and I think it has also taught me, in a way, to be discerning and hold out for items that are special. As for my use of color, I’m not sure where that came from, exactly. I’ve always been drawn to color, and in some ways my current home is actually toned down from what I’ve done in the past (if you can believe it)! ”

“My home has elements of boho, mid-century, rustic, and traditional decor, but I think when you look at my overall style, it’s really just eclectic. That’s partly because I love a broad range of styles and partly because I intentionally steer clear of well defined niches. I find my design is most inspired by my mood and how I want to feel.”
And you'll never guess which item has filled a spot in Brittany's heart but arrived in a trash bag. Yes, an actual trash bag.
“Favorite element is the rug. I bought it on eBay from a seller in Switzerland and it was the longest 3 weeks waiting for it to arrive. When it finally showed up, it was wrapped in duct-taped black trash bag but perfect nonetheless.”


It really is clear how active and present both Brittany and her husband are in this design. After all, it's their shared home!
“I also have to give my husband credit - he gives feedback on all my ideas and absolutely does not care a whit about what’s trending on Pinterest, so he calls me out on anything he finds gimmicky. Given my constant exposure to trends and ideas on social media, it’s grounding to have someone who keeps me focused on my vision.”

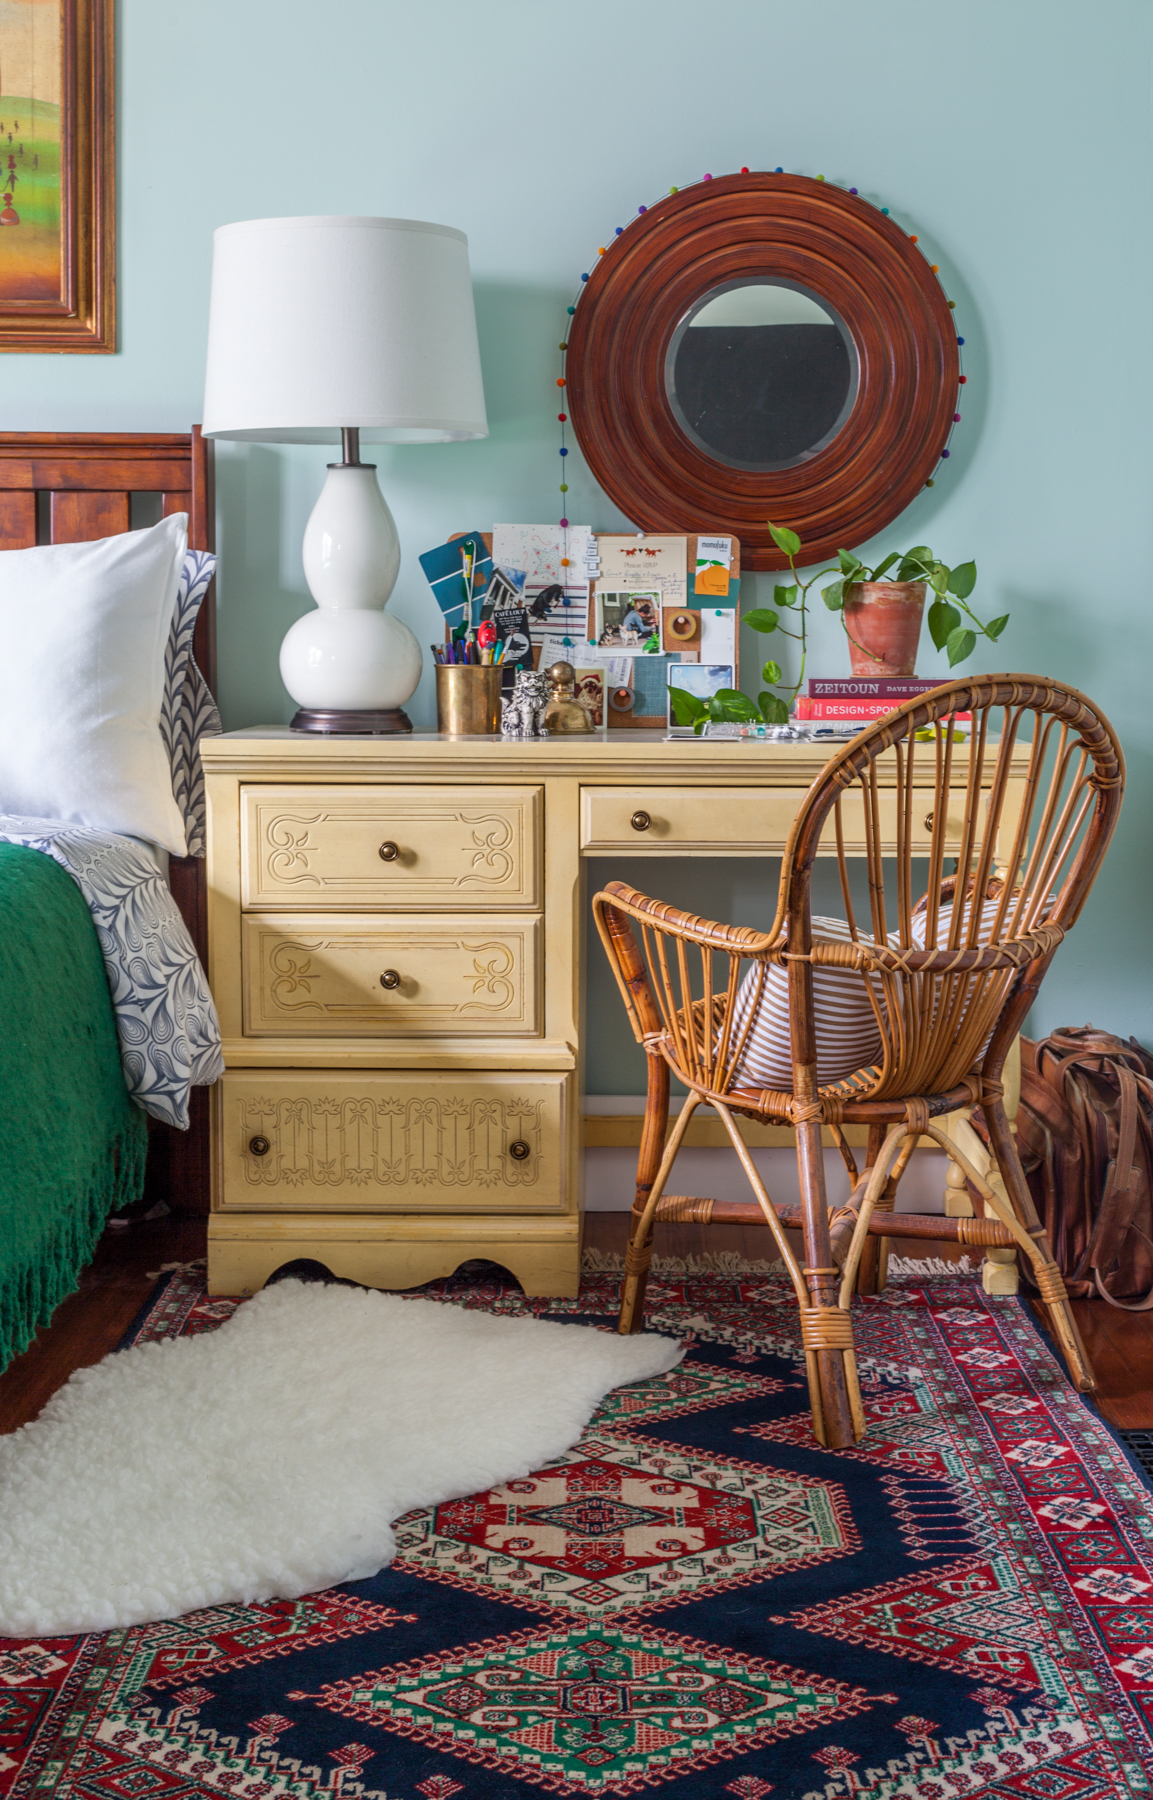
“[In the master bedroom], our favorite element is the nightstands. My husband found each of them individually (one at a flea market, one at an estate sale) about a year apart. A pair of these Broyhill Brasilia “commodes” is hard to come by, but I think finding two separately is even rarer!”

And the final favorite element in the guest room?
“Favorite element is the balloon painting. My husband and I wanted to buy a piece of art for our first wedding anniversary (the gift for which is supposed to be “paper”). We found this at a flea market, and even though it’s canvas, not paper, we couldn’t go home without it.”
Brittany's home is full of treasures - and we are so thankful to see it up close & personal! Follow Brittany along on Instagram @brittkingery for more!
Until next time,