Rustic Votive Holders {Holiday DIY No. 4}

Hey guys! We're barely into December but the holiday festivities are truckin' right along. We've been under the weather in our home since the week of Thanksgiving, and that's forced us, (me), to really lay the brakes on and focus the small reserve of energy on what I really care about; my people. Here are some of my favorite moments from the last week and a half...

Goodness me, there is much to be grateful for. (I was singing a different tune a week ago when we were bogged down by the flu and I was hosting one of the worlds largest pity parties. Such a wuss! But so grateful.)

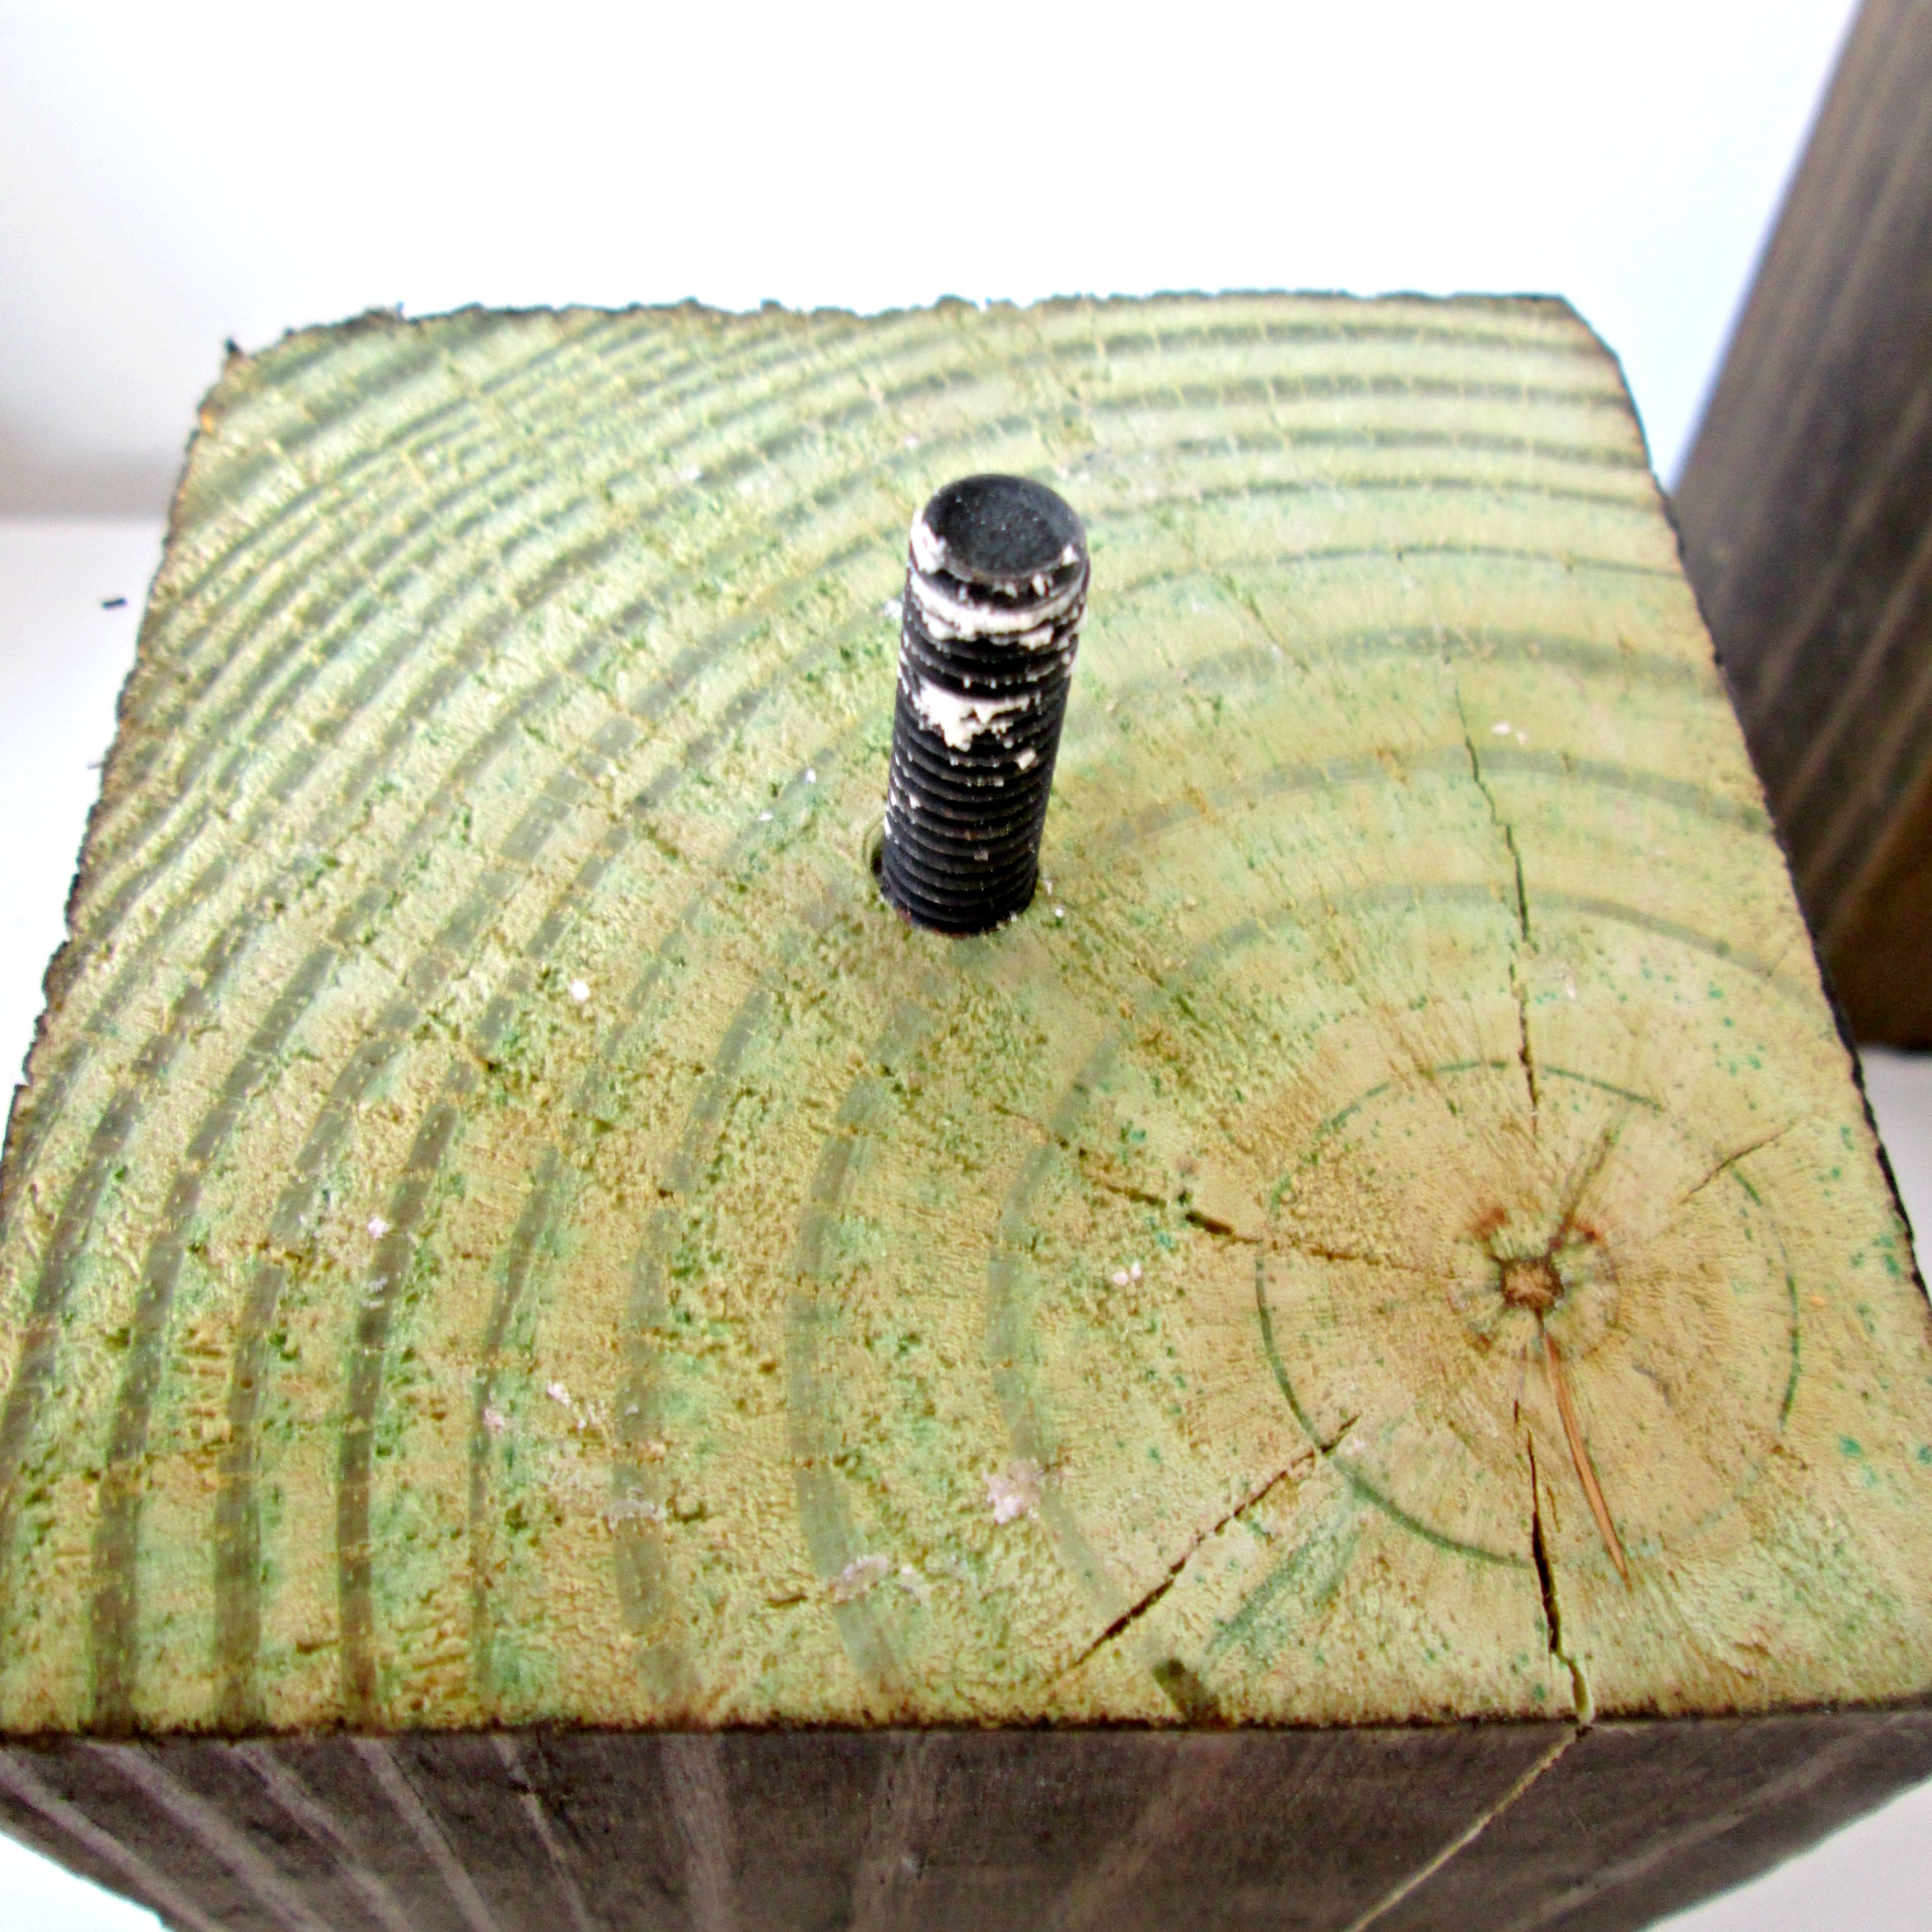
I'm excited to share this DIY project today because, truthfully, it was a happy accident! Over the summer we changed the legs on our sectional sofa - we, (Matt), ended up making the new legs from cut up blocks of 4 x 4 which we stained in Minwax 'Ash'. Since we had three extras sitting out in the garage, I thought they'd make awesome votive holders! I wasn't wrong...

This was really, really easy, folks. We pre-drilled a hole about 2" into the center of each block, and screwed in a hanger, (to do this, just wrap a dry cloth around the hanger, then use pliers to twist the hanger into the hole).

I left the top bare, but you could have some serious fun painting a complementing color to your own décor.

Then I screwed a hole into the bottom of the candle, about an inch to an inch and a half deep, just to keep it secure.

All done!

If the thought of cutting a 4 x 4 plank of wood doesn't excite you, you could either a) Grab a hardware store employee and ask them to cut it for you, (they do this for free at the big chains like Home Depot and Lowes), or b) Ask a store employee if there is any scrap wood leftover from other people's cuts which you could take.

Rather BUY than DIY?

Check these out from Tellus360Shop on Etsy!

I'll be signing off until Monday when I'll be back to share our full holiday home tour, but Cate's got another goodie for ya coming up tomorrow, (Friday)!

Thank you so much for stopping by! Have a fab weekend!

Paper Feather Wreath {Holiday DIY No. 2}

Mmmmmm. The weekend is here and it's already tastin' sweet, friends. If you're up for a little holiday DIY project, I've got a goodie for ya! What I love about today's DIY is that it's not screaming 'Christmas!!!' It's a piece you could easily leave out year round! But since it's a wreath, we're tossin' it into the Holiday bucket.


First things first - I absolutely cannot take credit for this project. I saw it months ago when the ever clever Melaine shared it on her My Sweet Savannah blog! The moment I saw this project I knew it would be one of the first things I made for this year's holiday season.

Let's get started! First, you need to print about 7 copies of this page on cardstock. I did this from home on FedEx online - placed my order for 8 x 11 size prints, and then picked it up, (I only used 7 sheets, but I would advise getting 10 just in case). This will cost less than $10.


Now for the fun part! You're going to cut out each feather. After cutting the feathers from the page, you'll add small cuts to each feather to give them a bit more dimension and authenticity. 

feather wreath before2.jpg

Okay, bare with me here. This next part I did not take a picture of. As per usual, I worked on this little ditty while racing cars with one child, braiding Ana and Elsa's hair with another, and coaxing my third to keep his socks on and stop hiding them under the couch cushions...it's a beautiful kind of chaos, indeed. Back to our project! You're going to need a wreath frame at this point! Cardboard will do the trick. I just used a mixing bowl turned upside down to trace a large circle on a piece of cardboard, cut it out with a box cutter, then traced a smaller circle on the inside, and carved that one out.

Once you've got your wreath frame, just grab a glue stick and go to town! There's really no rhyme or reason to sticking your feathers on. I found it easier to start with the big blue guy first, then surrounding him with the smaller plumes, working my way around the frame one section at a time.


That's it! Not too difficult, eh?!

Rather BUY than DIY? We've got you covered.
This wreath from Anthropologie hits all the right notes of festive, elegant, and whimsical. (And if you follow the link, you'll see they staged it in one picture with white pom-pom garland, which I shared a tutorial for last week! Anthropologie and I are so in sync with each other....)

Don't forget to share your holiday decorating ideas and projects by posting your photos to our Facebook wall or tag #stylemuttholiday on Instagram!

Thank you all for stopping by and have a beautiful weekend!

This project is linked to RemodelAholic, where you can find dozens more Holiday DIYs!


DIY Holiday Countdown!

Hi All! The season of decking our halls is right upon us and I'm very much looking forward to it! Yes, I do realize it's a bit early, but listen - I'd rather do a few projects now and be free to enjoy and celebrate the holidays when they're actually here! I'm sure anyone on either side of the 'what's too early' debate could appreciate that.

Last year I started a 'One A Week' series in mid-November where I shared one holiday DIY project each week until the week of Christmas! It was such a hit that I've been so excited to do it again this year...with brand new projects!

So, starting next week I will be posting one holiday do-it-yourself decoration each week until Christmas. None of the projects are complicated and the longest one takes less than than 2 hours. 

Let's have some fun!

Week 1: Paper feather wreath
Week 2: Geo painted coasters
Week 3: Stained wood votive holders
Week 4: Handmade ornaments
Week 5: Deer string art
Week 6: Book page fan garland

No way do I assume anyone would do all or any of these. Your schedules fill up this time of year, I absolutely get it. Just wanted to put these ideas out there for anyone itchin for a little project, that's all. And please, please, please, for the love of inspiration, share your holiday decorations and projects either on our Facebook wall, or tag #stylemuttholiday on Instagram! I did this last year and had a blast seeing all the beautiful work that others shared! We LOVE seeing your handiwork!

|| Here are the projects from 2013! ||

Thank you for stopping by and have a lovely weekend! I'm off to get my wisdom teeth out today so I'm pretty sure I'll be having the best weekend of all in pain killer la-la land!