Bedroom Re-Do || 2017 Flip List Item No.6

Like Chelsea said yesterday, our bedroom has always been a flat note to me.   We've tried a couple different looks over the past two years (see here and here).  Each time we rearranged, it felt like I inched a little closer to the vibe I wanted but without ever bringing the design to full fruition.

So I added item redoing our bedroom to the 2017 Furniture Flip Bucket List in the hopes of figuring out what was missing from this neglected space.  

DSC02587.jpg
DSC02535.jpg

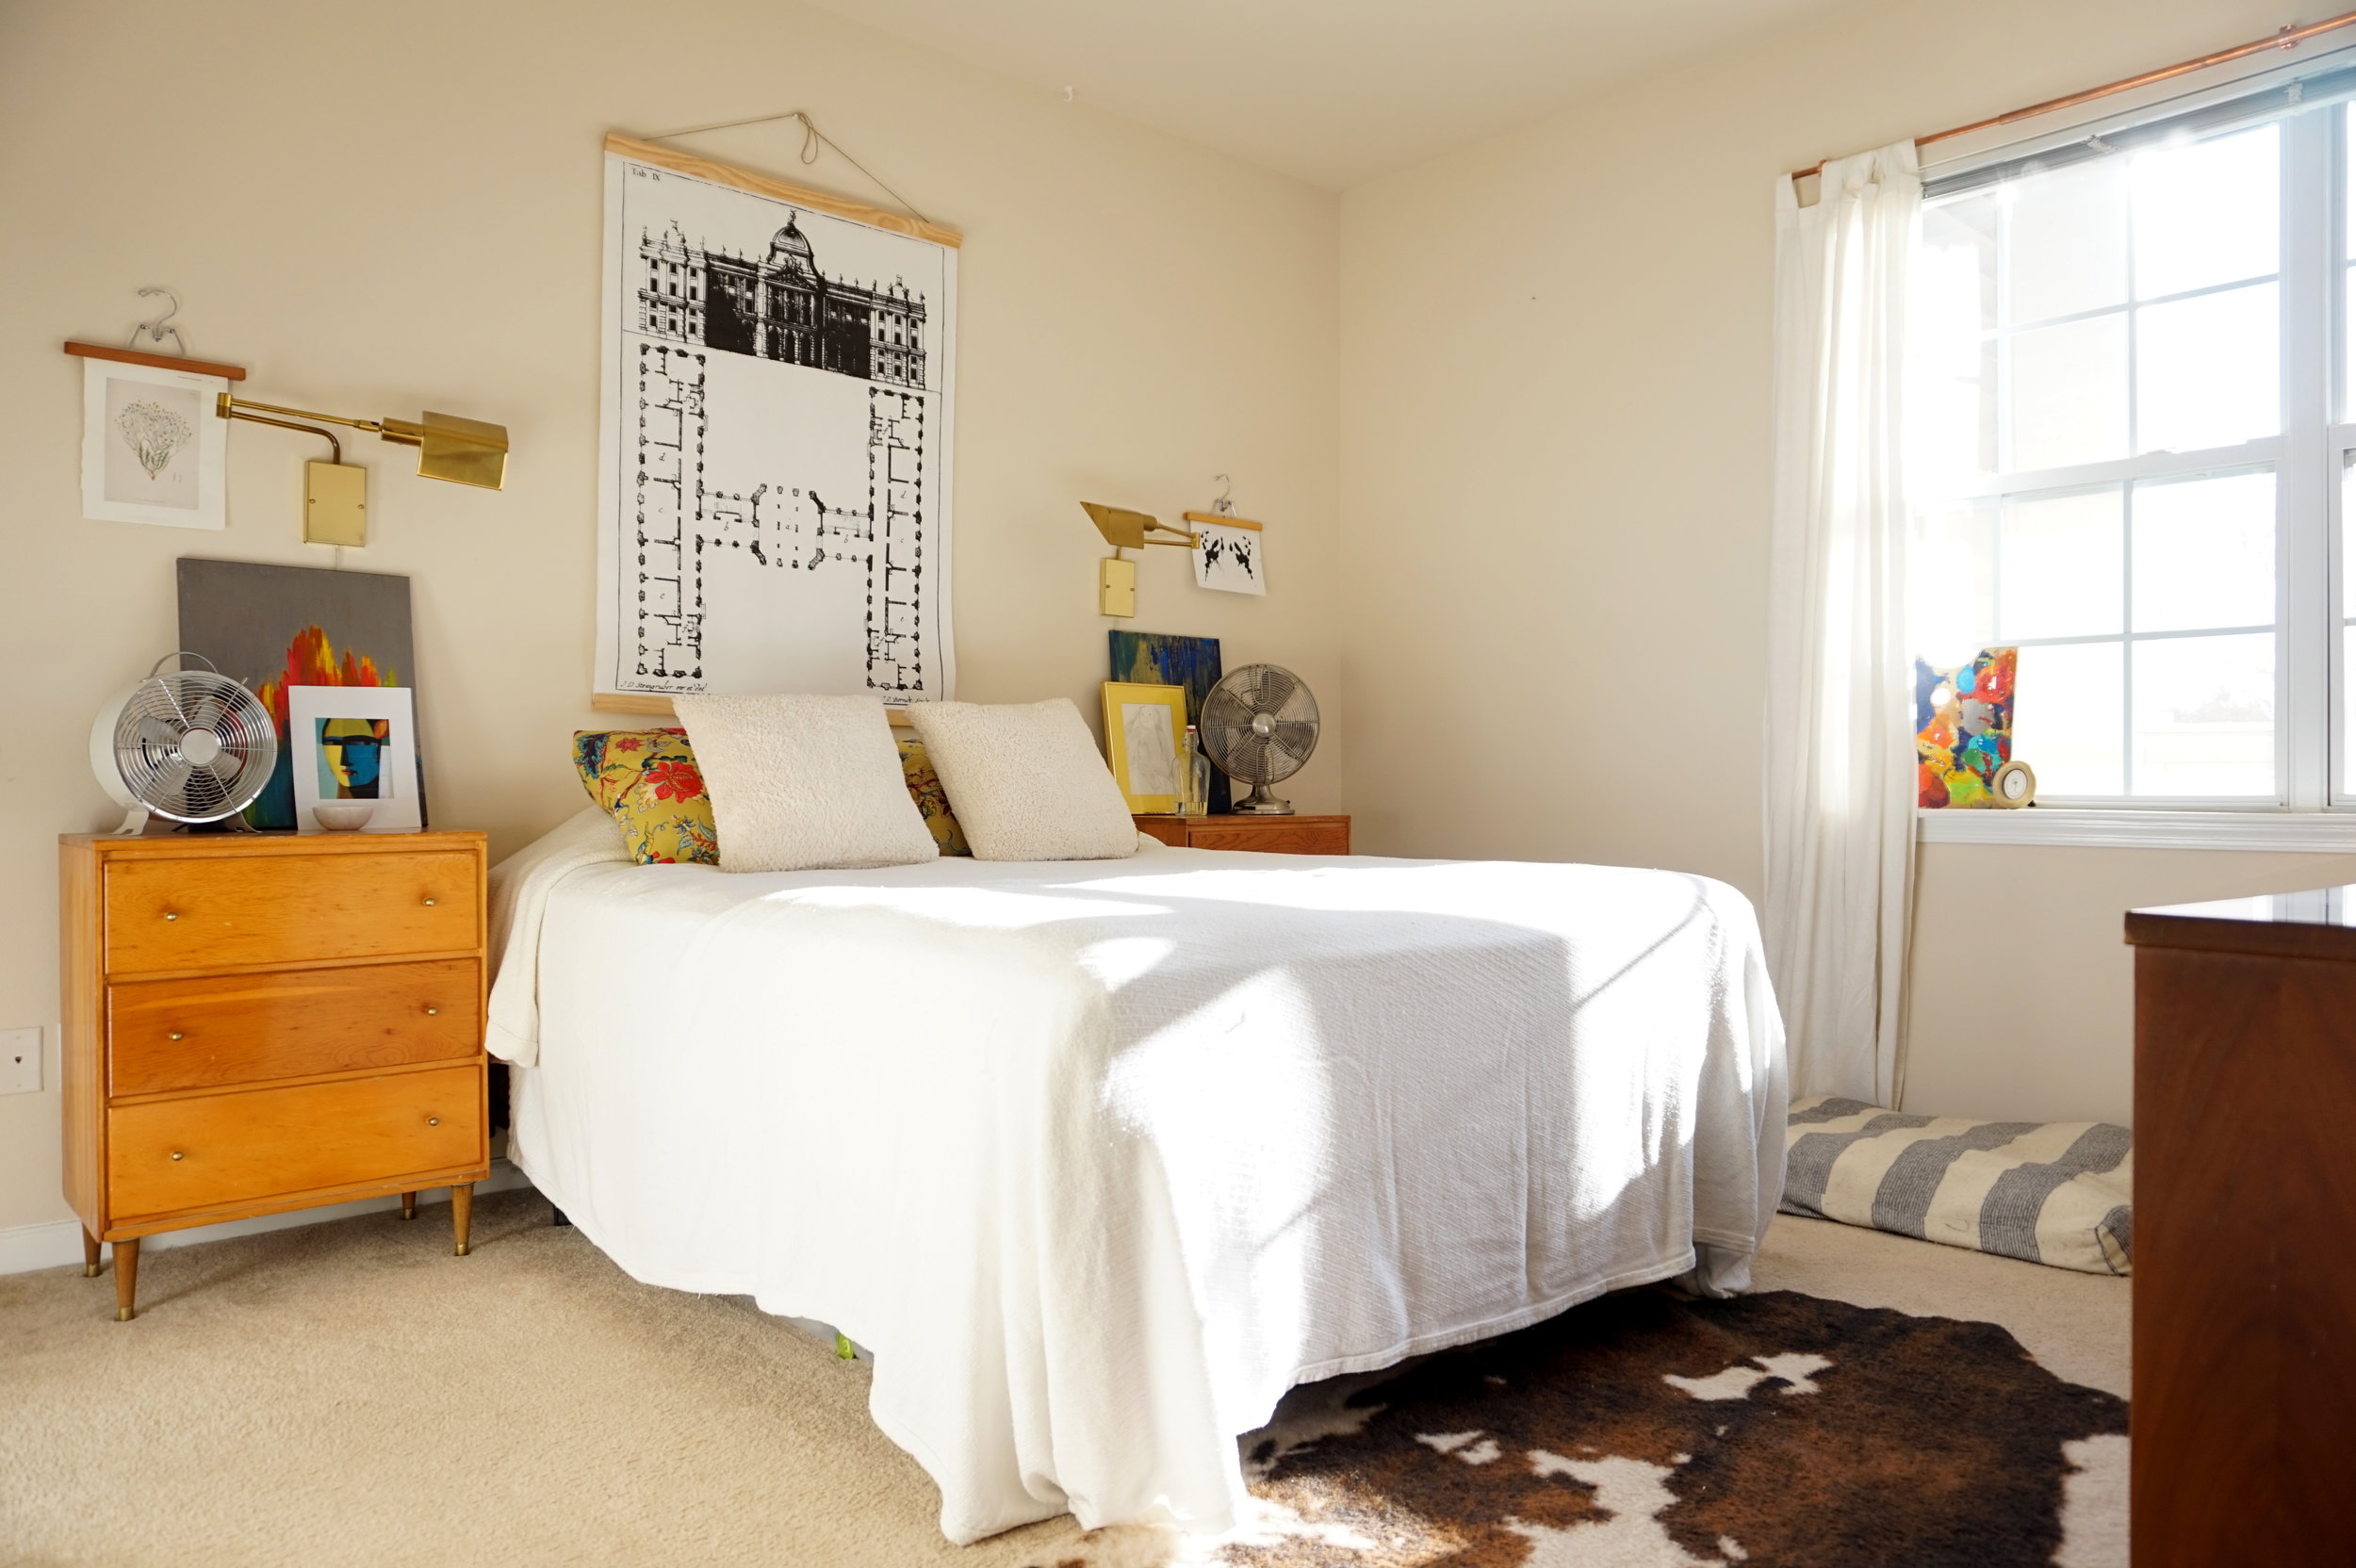
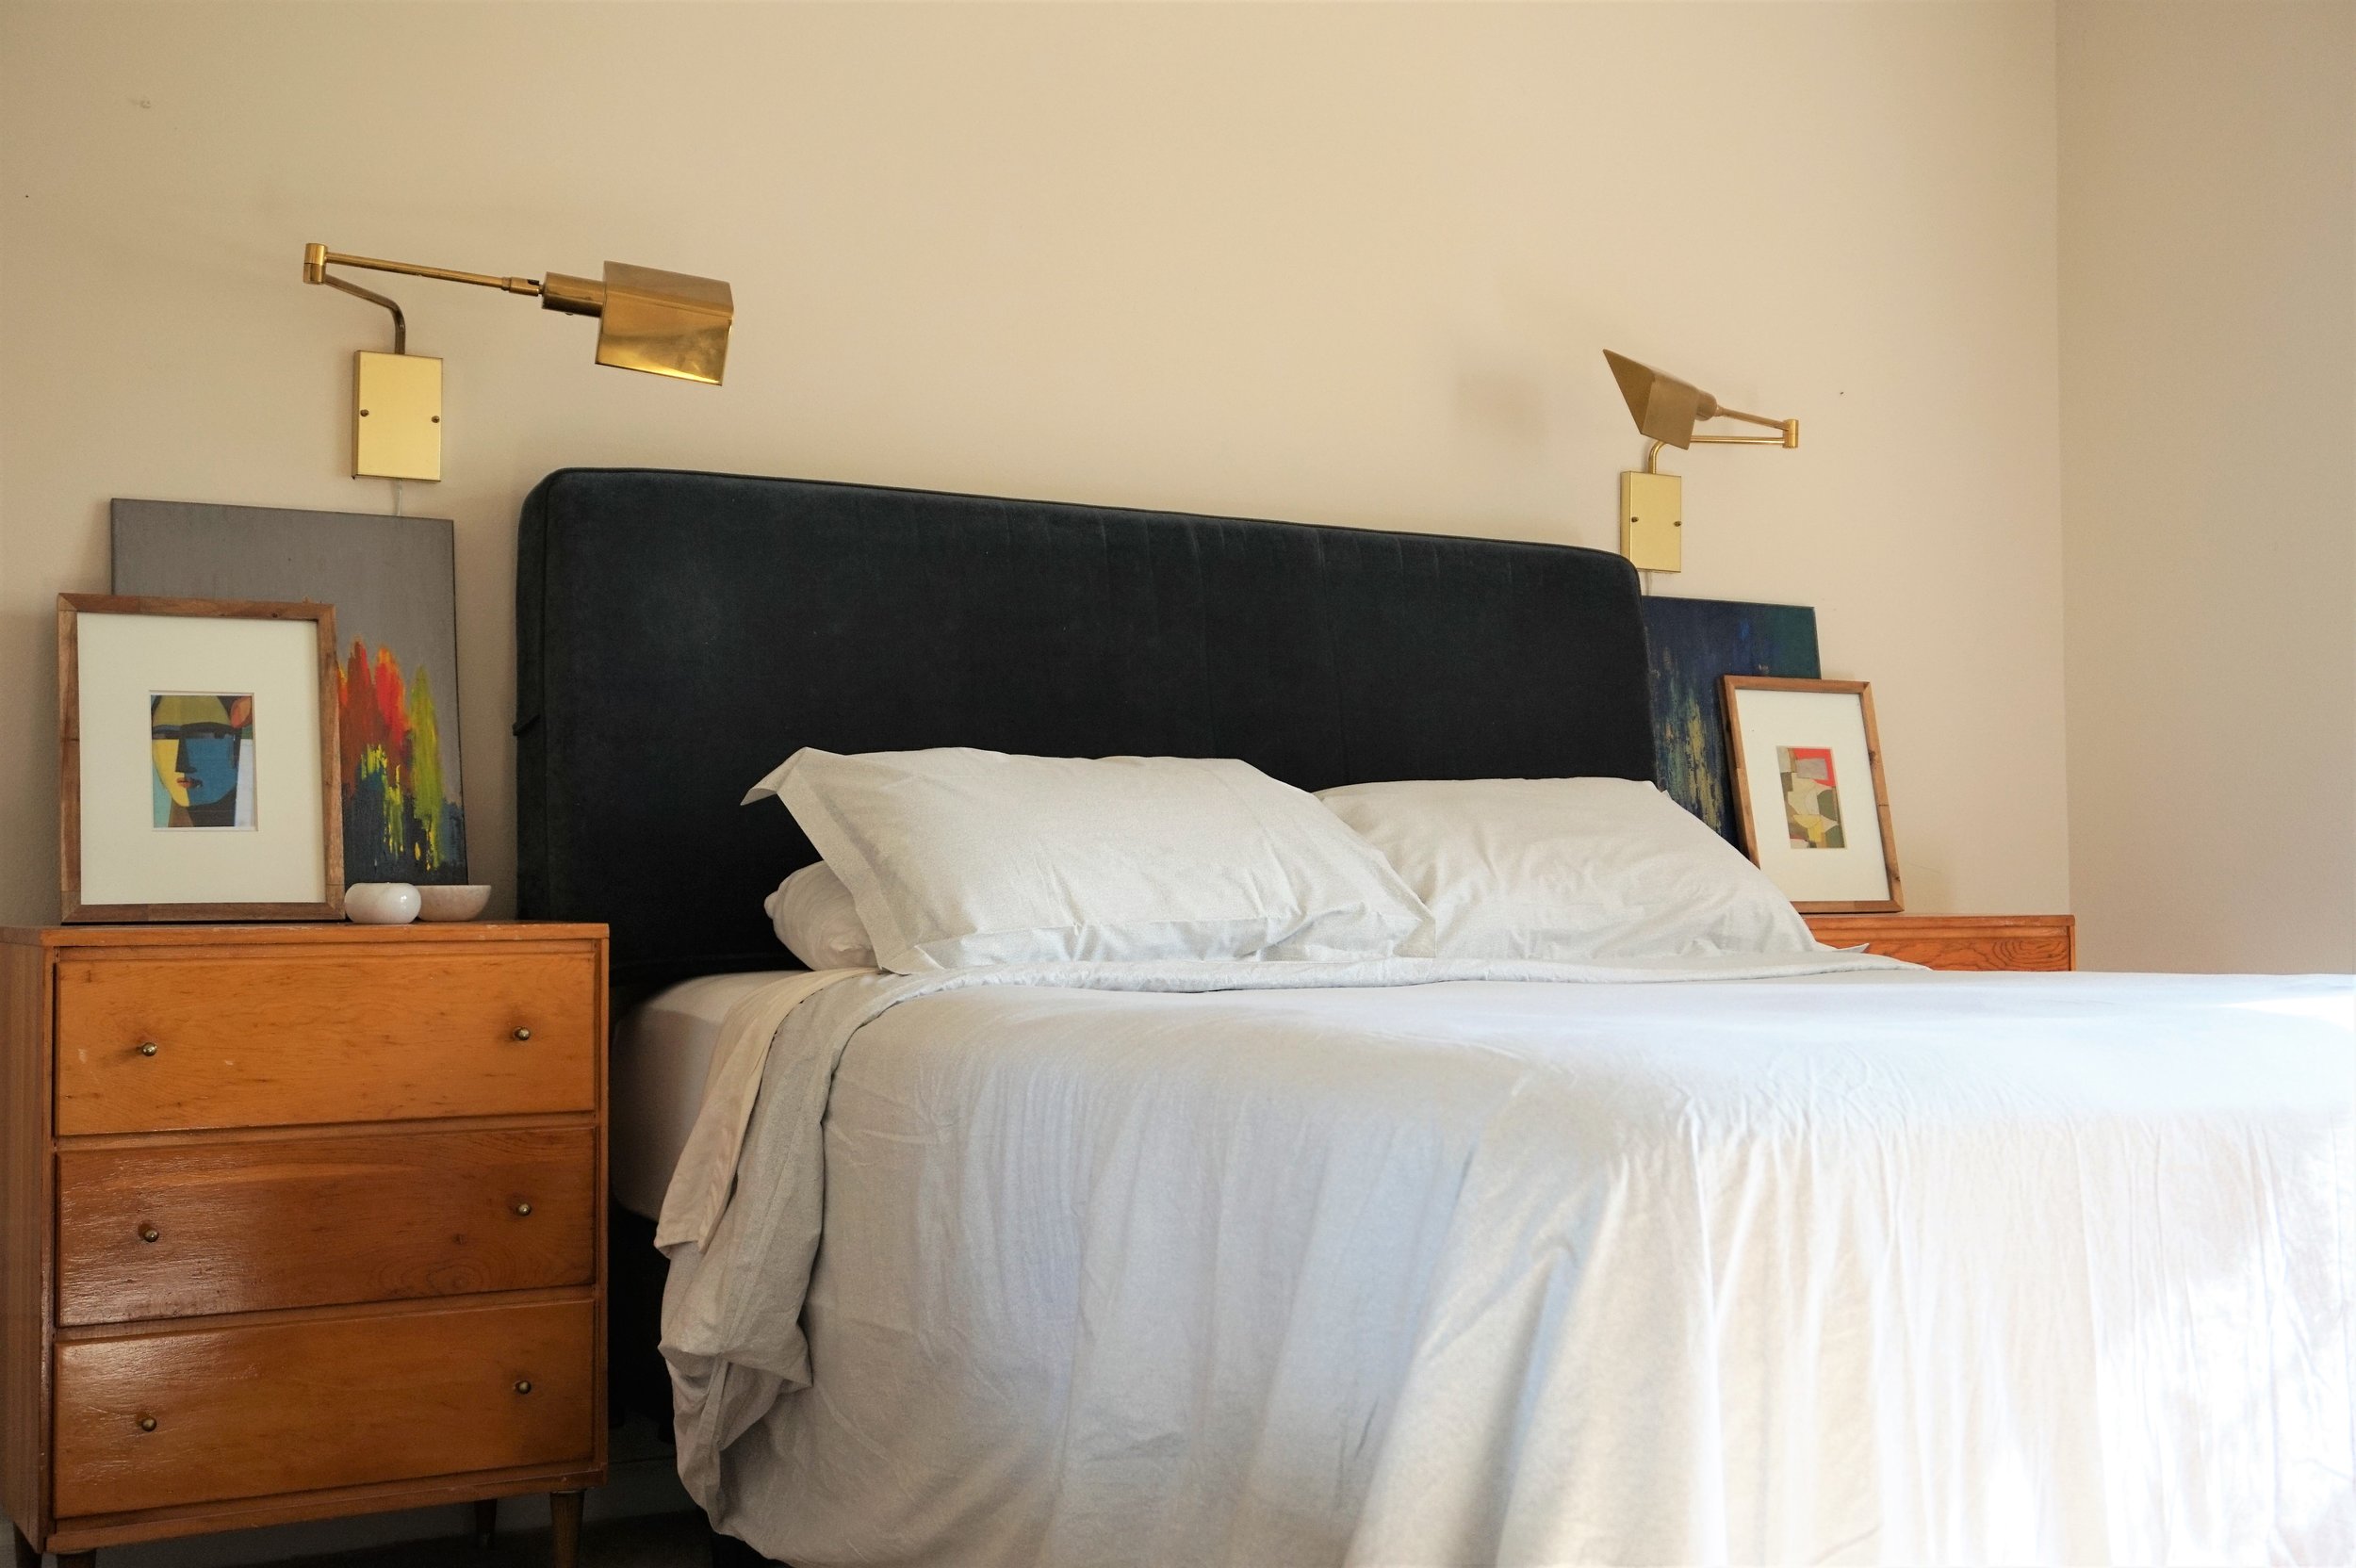
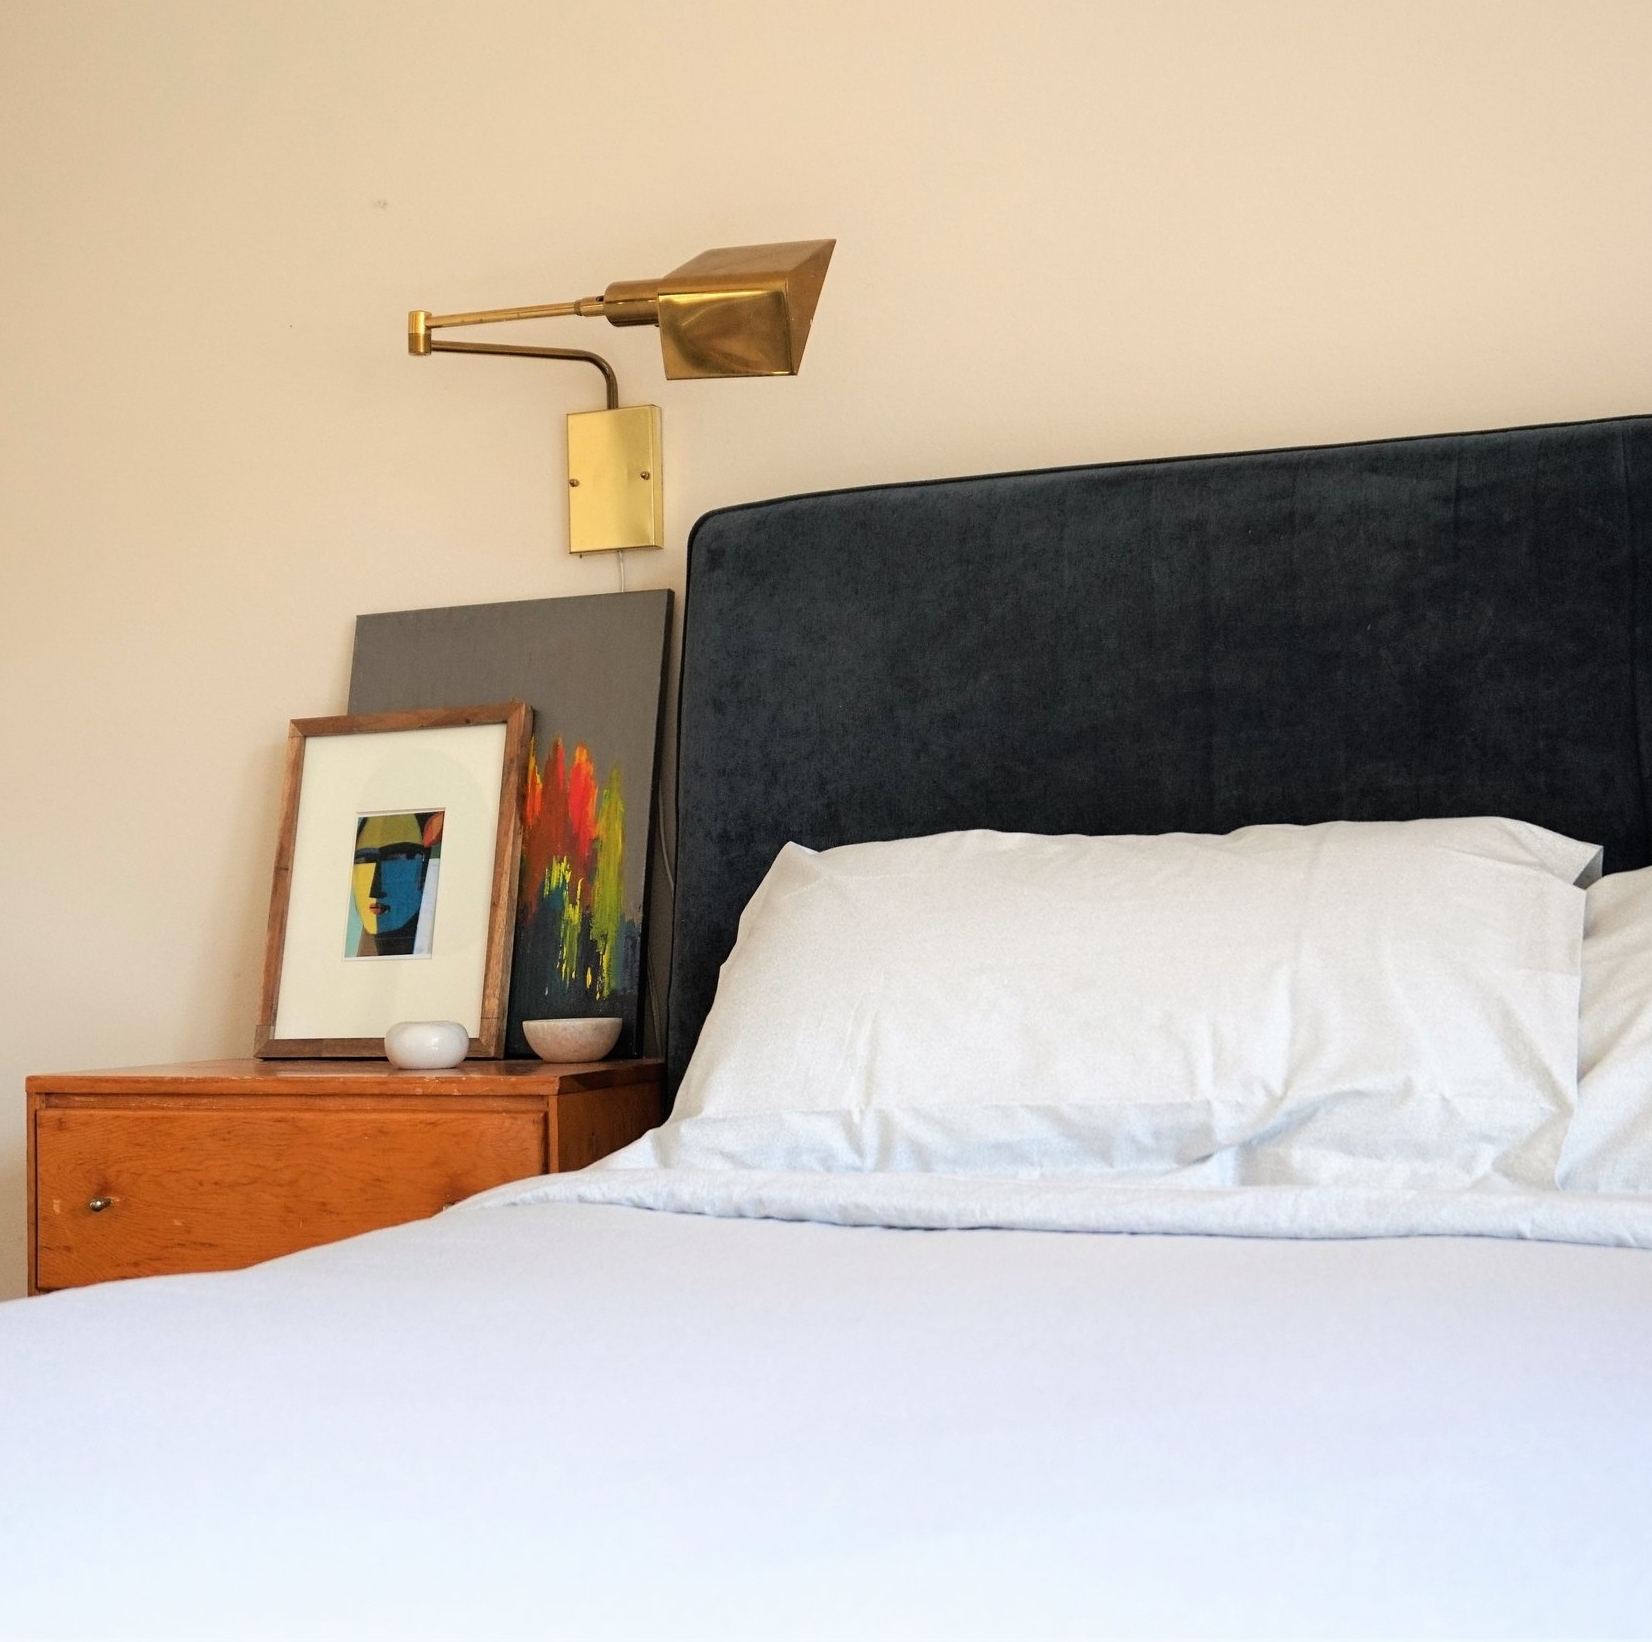
The first thing that greets you when you walk into our bedroom has always been my nightstand.  I fell in love with this vignette ages ago so I used it as inspiration for the rest of the space: warm wood + pops of color + a glint of brass.

DSC02569.jpg
DSC02516.jpg

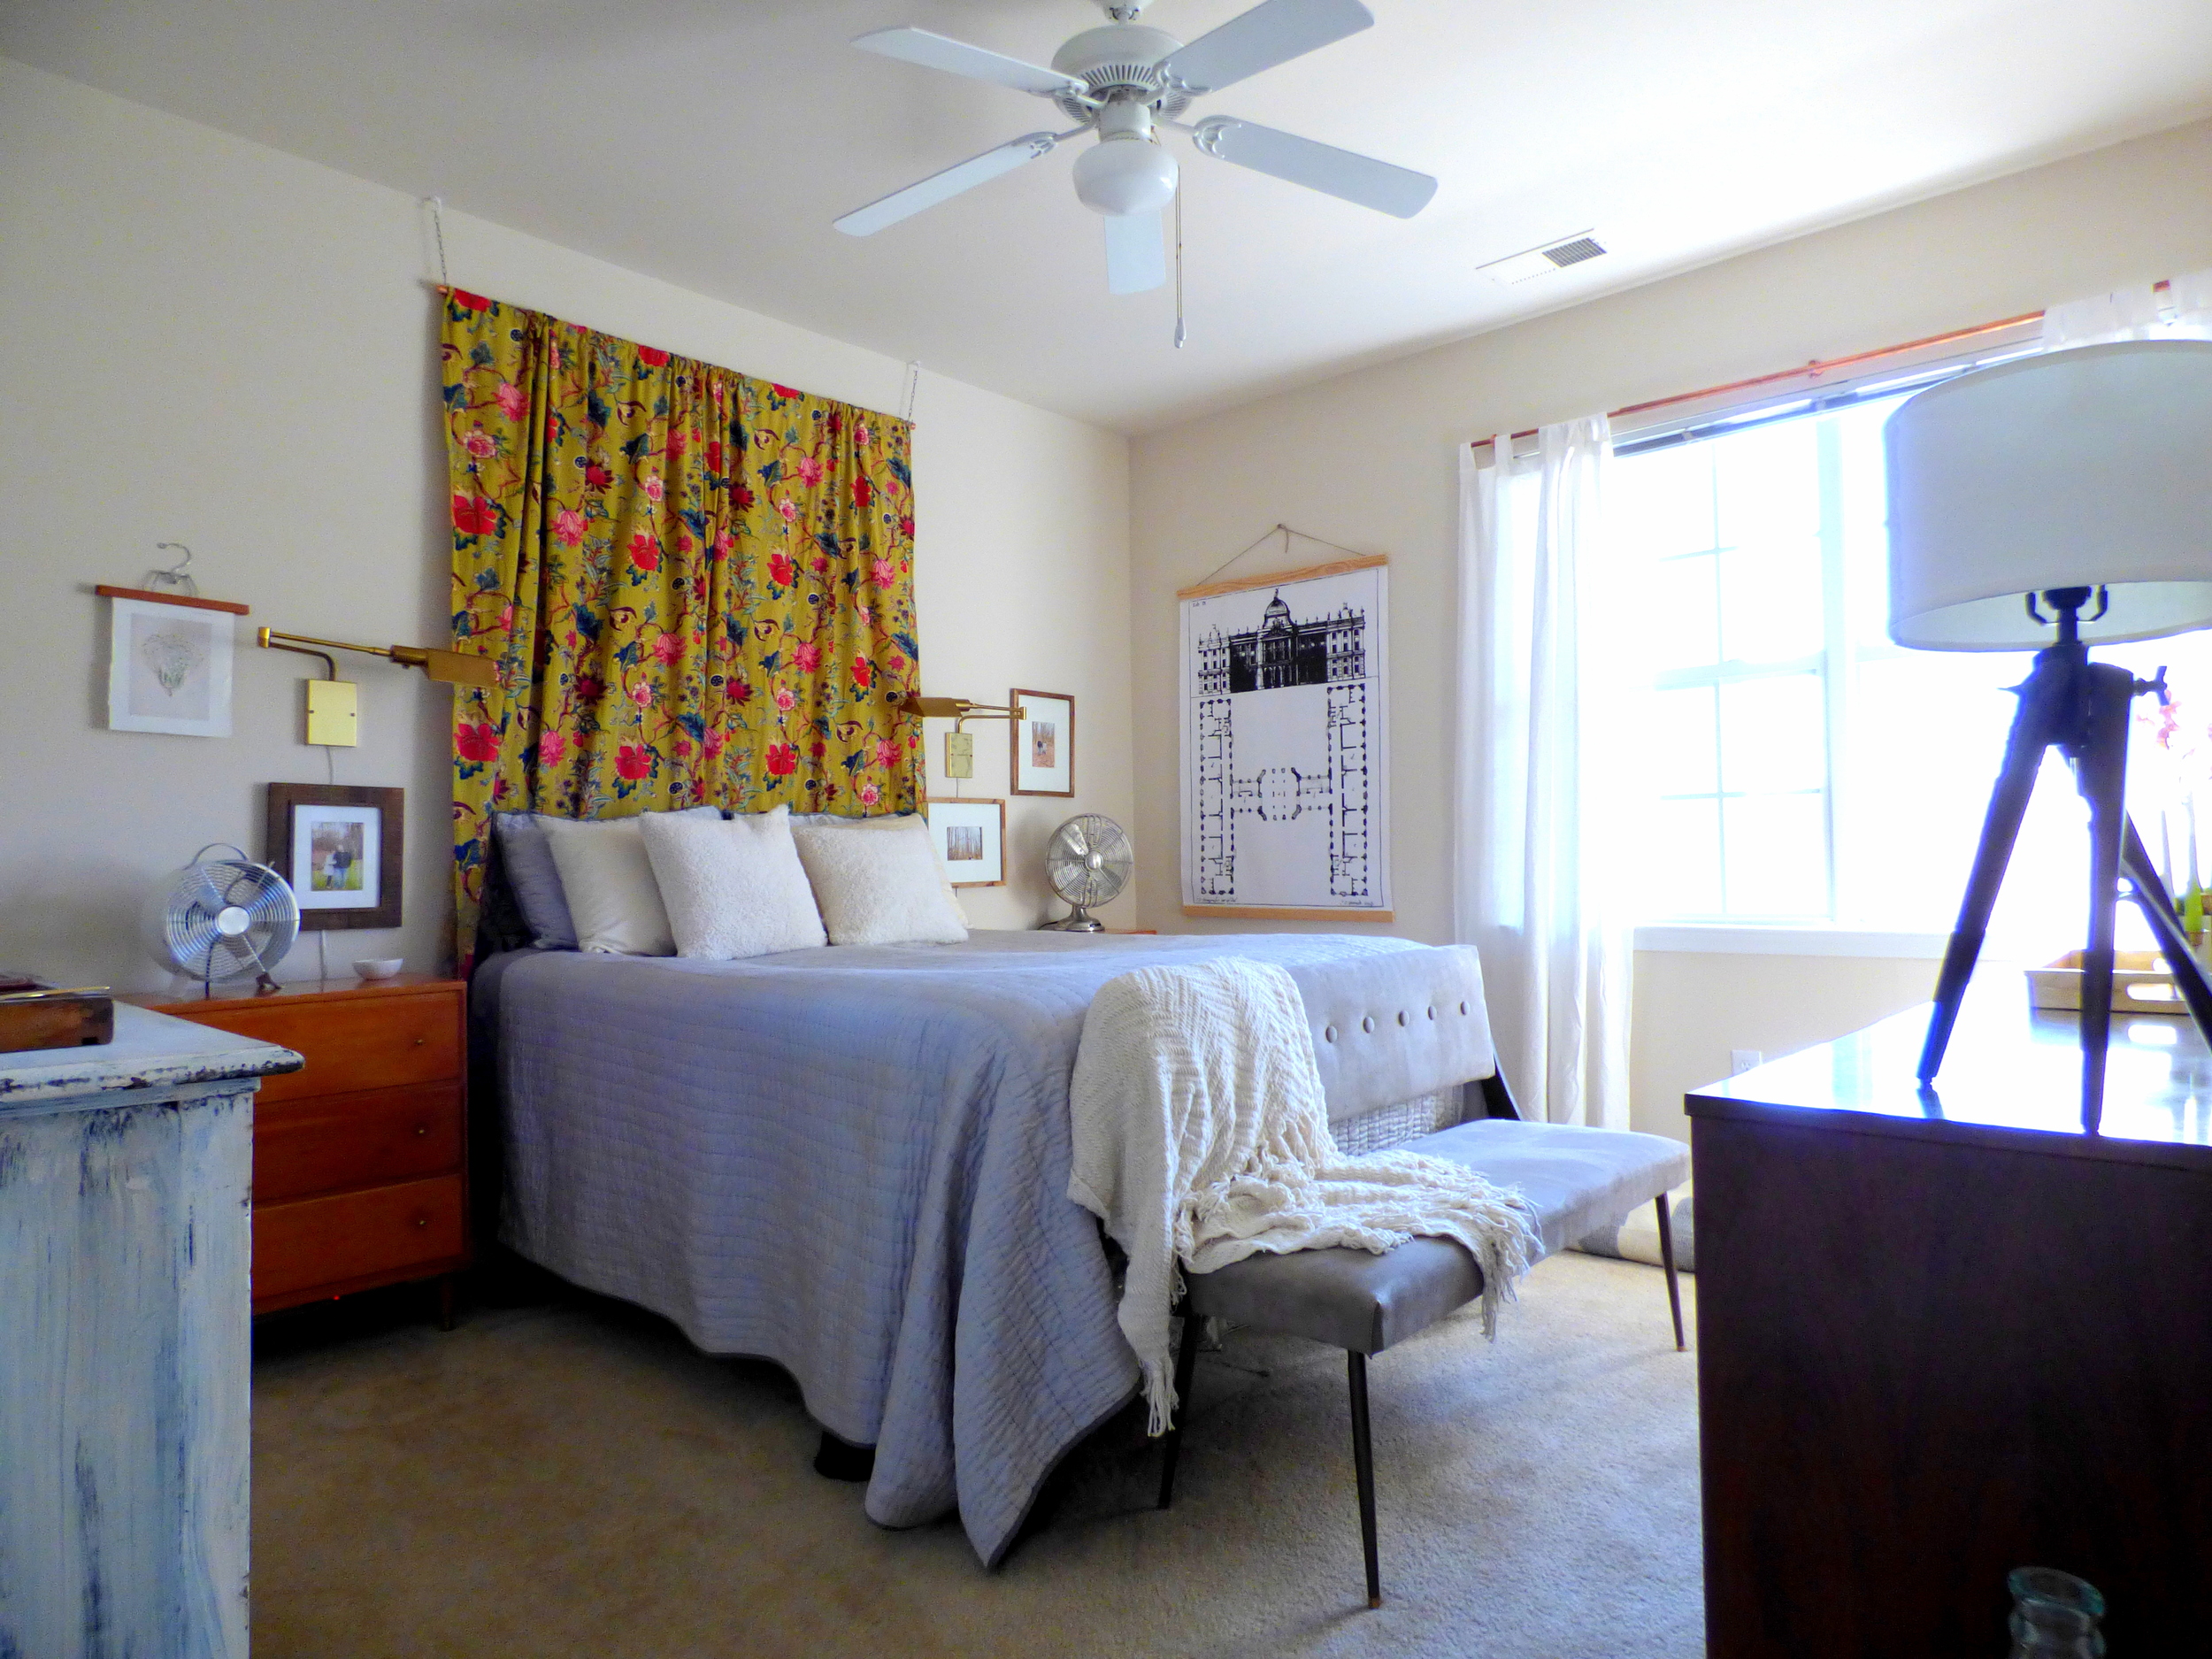
In the past looks I’ve tried, we’ve never had a headboard.  I think that made me feel like there was something juvenile about our space.  So this time around I needed to see if a headboard would help refine our bedroom.  And I gotta say I am loving the anchor of the plush blue velvet!

DSC02566.jpg
DSC02503.jpg

I also kept my beloved leather + brass cantilever chair in the corner by the window.  

DSC02494.jpg

I think one day I’d ideally like to use this chair at a desk, but until then I guess my husband can keep throwing his “clean” underwear on it *insert facepalm emoji.*

DSC02580.jpg

Next to the chair is our thrifted MCM dresser.  I found this bad boy for only $50 and eventually scored the sunset mirror to go with it.

DSC02490.jpg
DSC02484.jpg

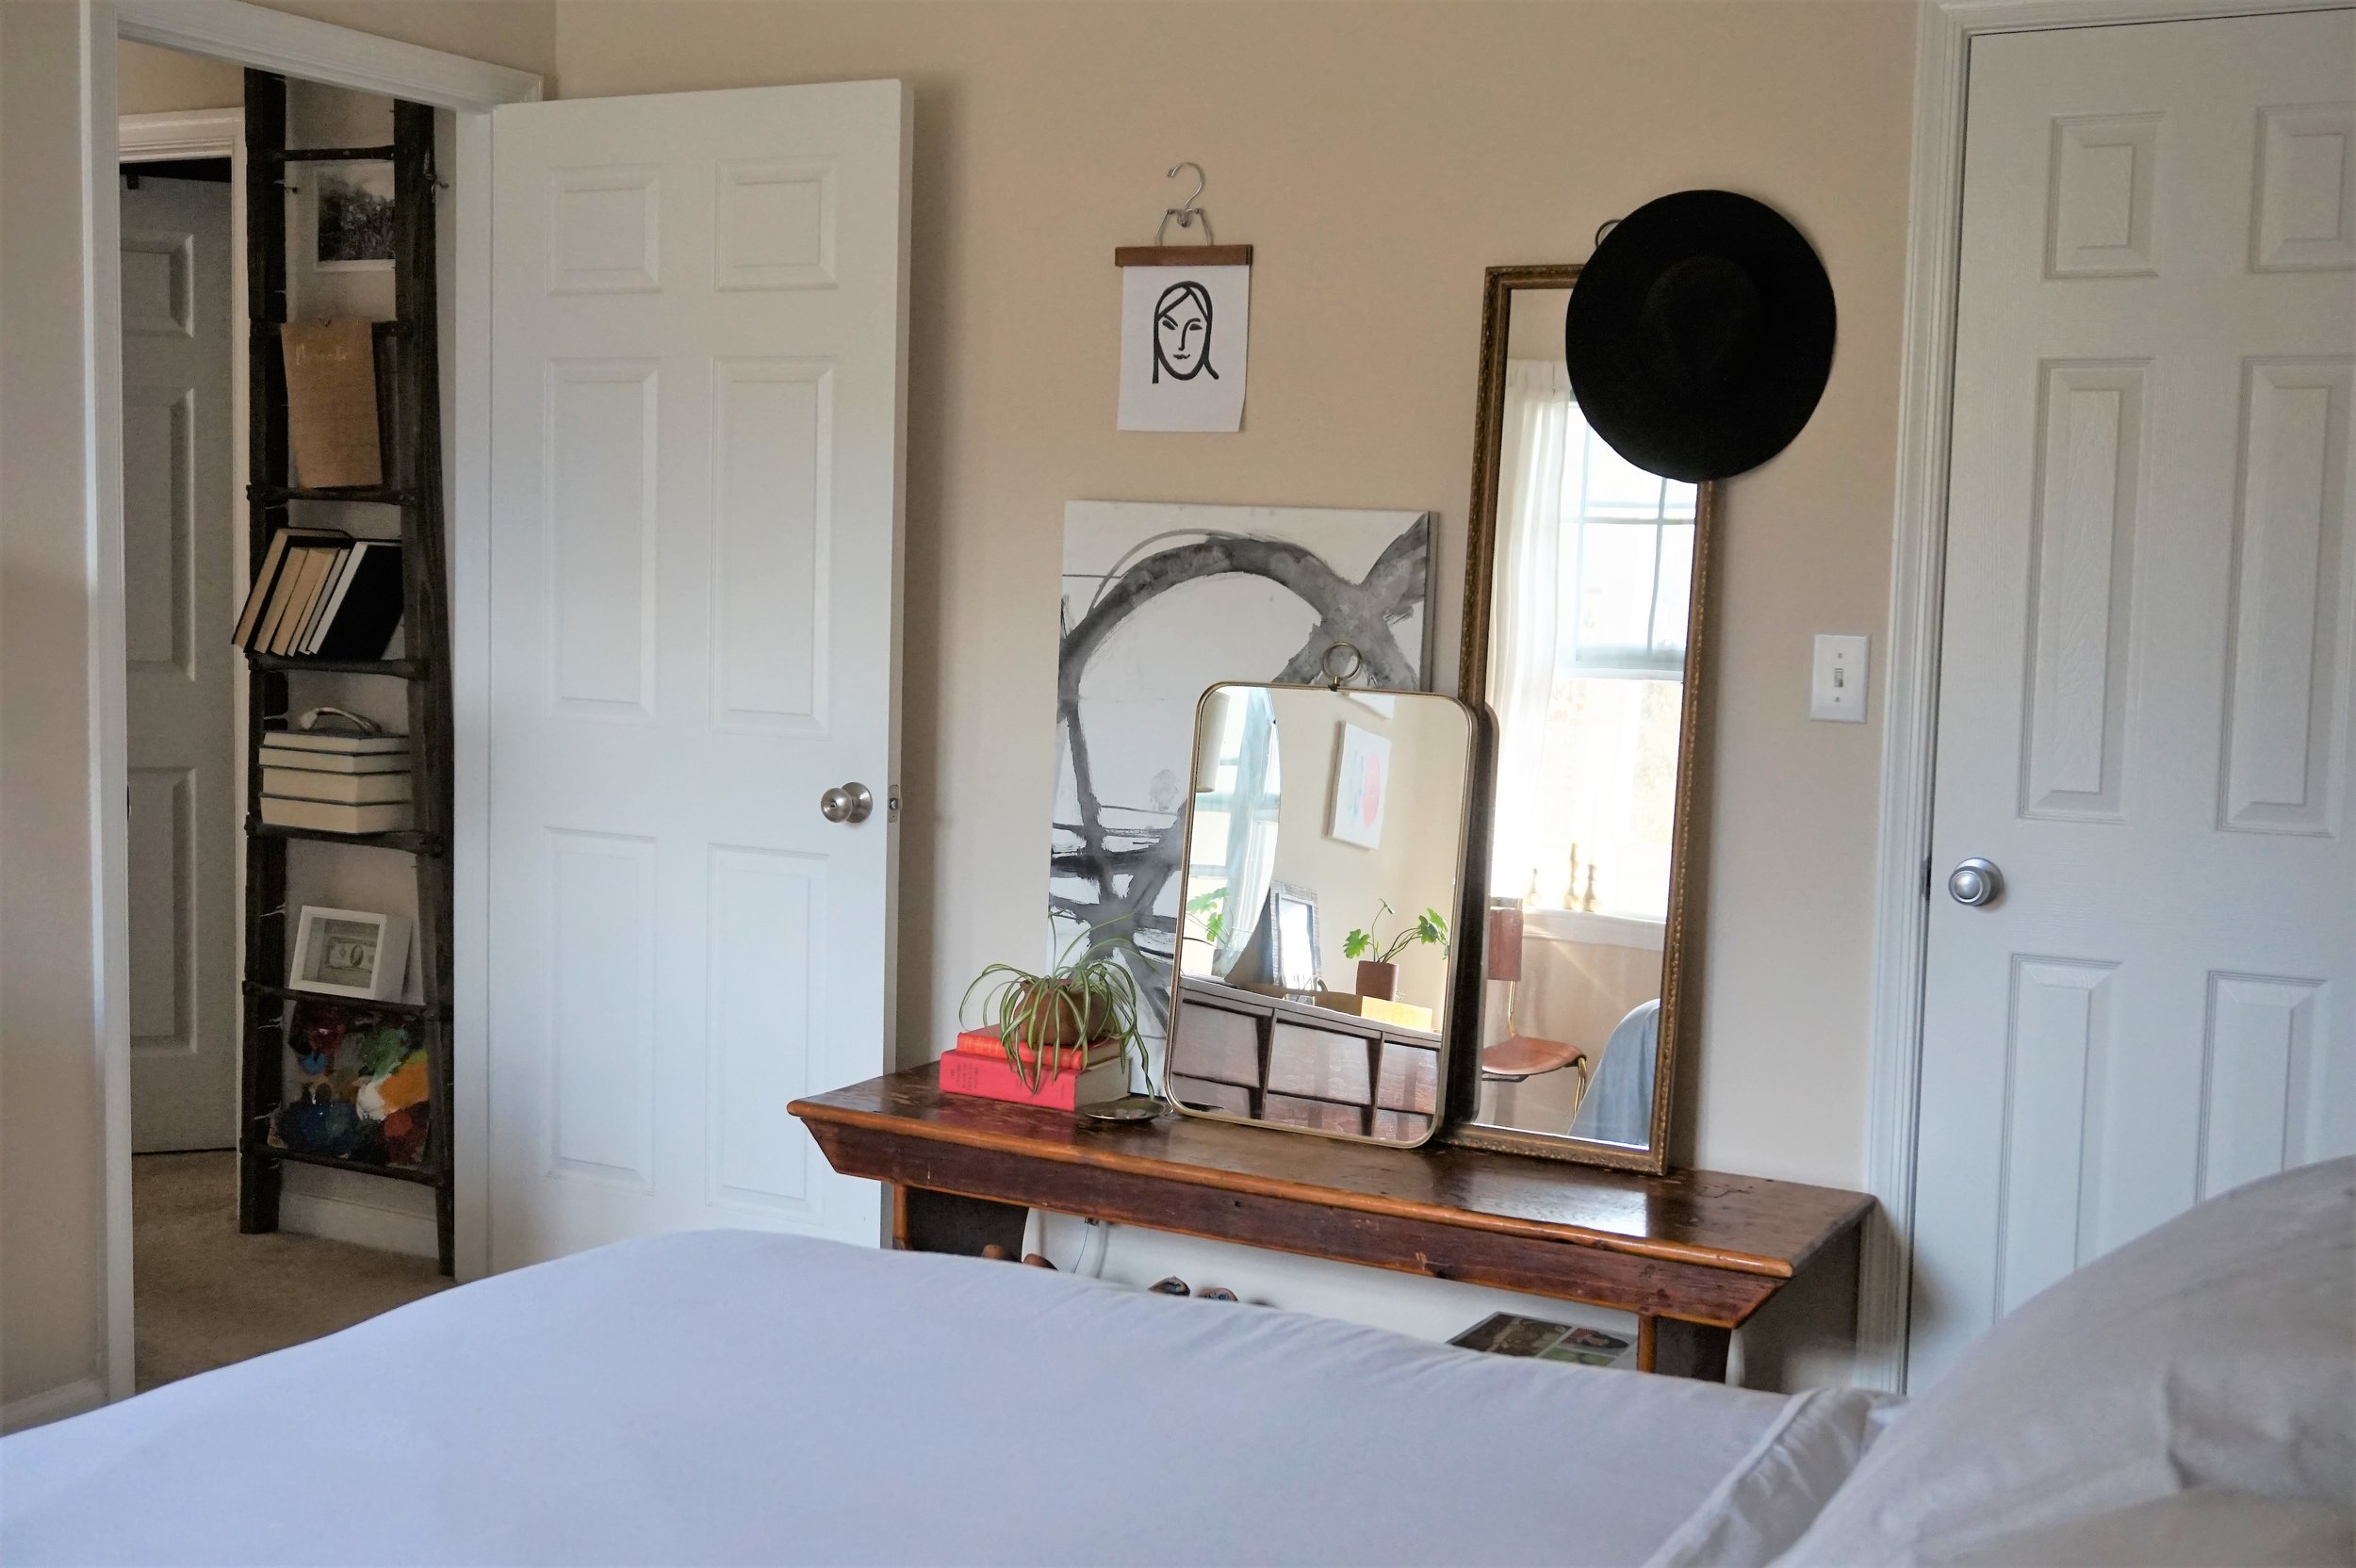
Just outside our door you can peek the roadside rescue ladder I've often used as a lateral storage piece.  Our hallway doesn't have much going on so I added the low-profile vertical piece for some architectural interest.

DSC02487.jpg

In this redecorating process, I did figure out that I’m bothered by the lack of varied furniture height in our room.

DSC02570.jpg

I shopped our apartment to introduce something lower as an alternative storage piece - do you recognize it?  This bench was actually our coffee table but I liked the idea of converting it to a get ready station.

DSC02577.jpg

The pièce de résistance to the makeover however is new bedding... I never realized how grown-up it would feel to have a real duvet cover!  We scored the Marble Percale Duvet Cover and matching shams (guess what - their on sale!) from Cstudio Home and it’s perfect for me and my oven-of-a-husband (ok I’m an oven too).  

 
Don't forget to check out Chelsea's Cstudio Home finds in her bedroom reveal... Gasp!  That shag pillow cover!  *heart eyes heart eyes heart eyes*
DSC02594.jpg

True, most of this makeover is a series of subtle tweaks.  What can I say?  We’re still in a rental after all.  But this modest assortment of new things has me feeling right as rain.  Until I get the itch to change it again that is... ;)

DSC02597.jpg

And on that note, that’s officially a wrap on the 2017 Furniture Flip Bucket List!  After two years of late finishes, it feels good to cross the finish line with a month to spare.  I’ve already begun percolating what I want to tackle in 2018 so stay tuned for next year’s list come January!

 
0 down.jpg
 
Cate.jpg

Seven down, zero to go.  Catch up on the 2017 Furniture Flip Bucket List.
How to Repair A [Seemingly] Hopeless Dresser

As I mentioned on Monday, I finally found the perfect dresser for the next item on my 2017 Furniture Flip Bucket List.  


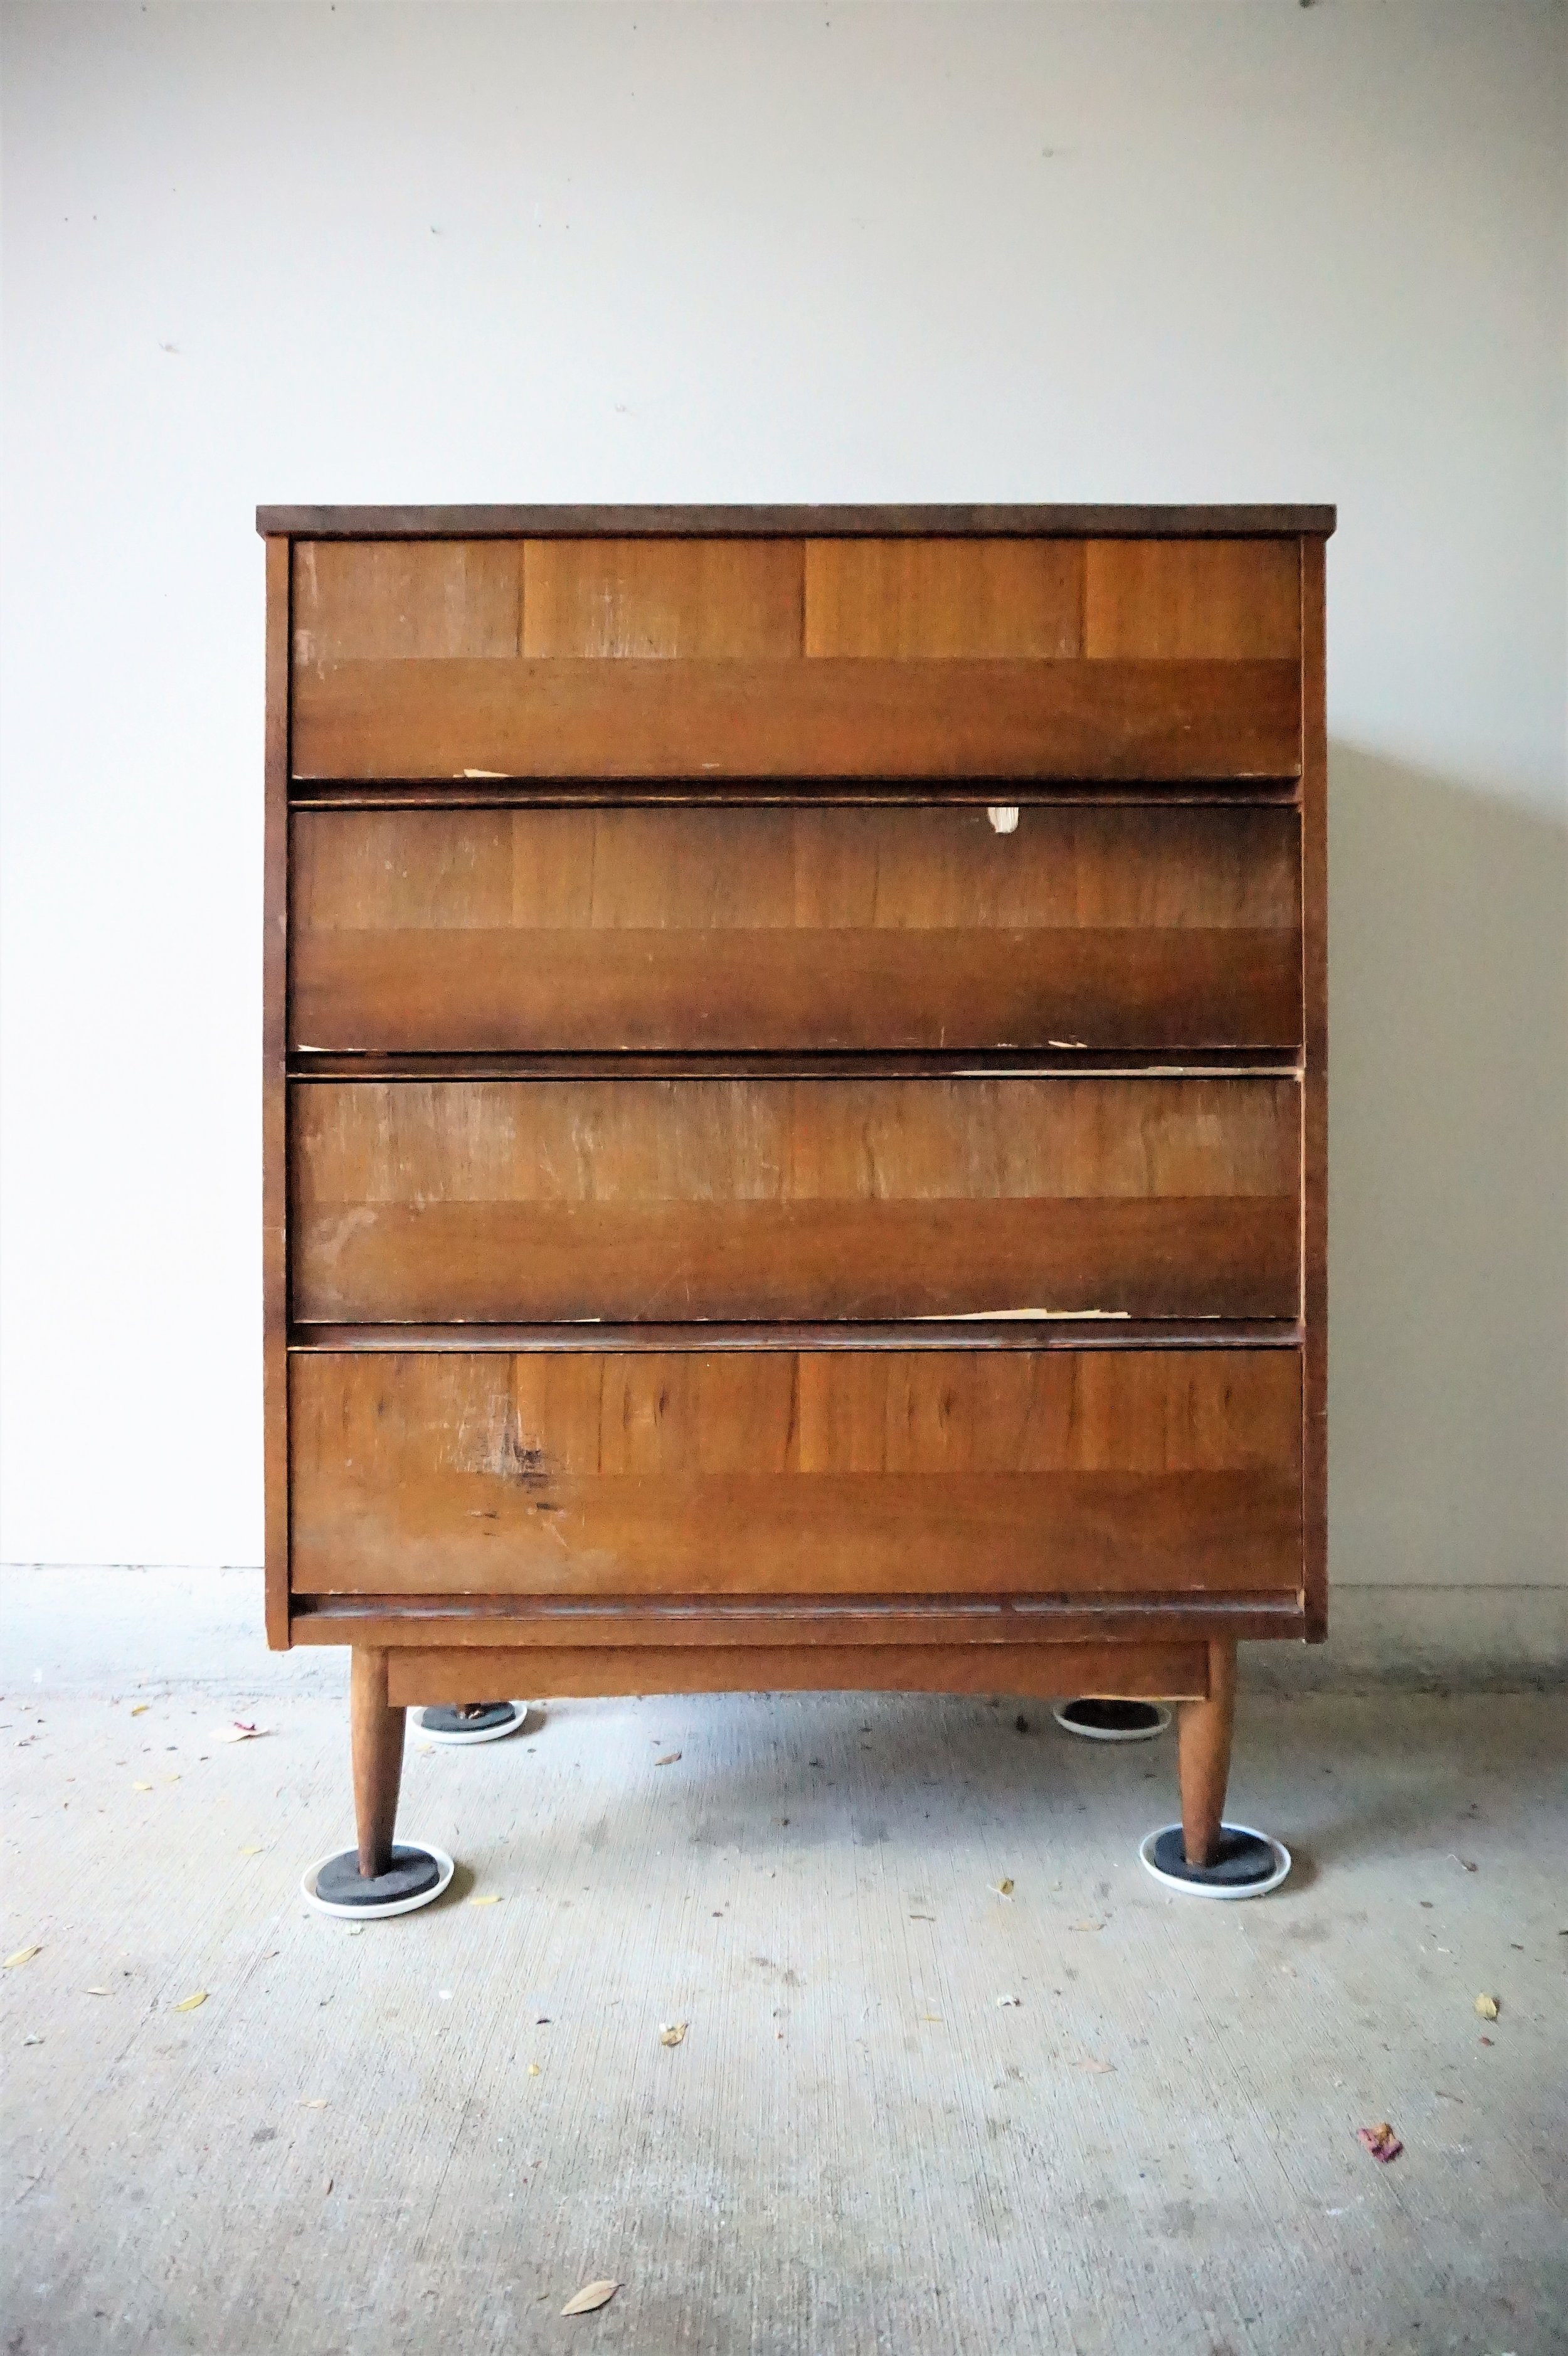
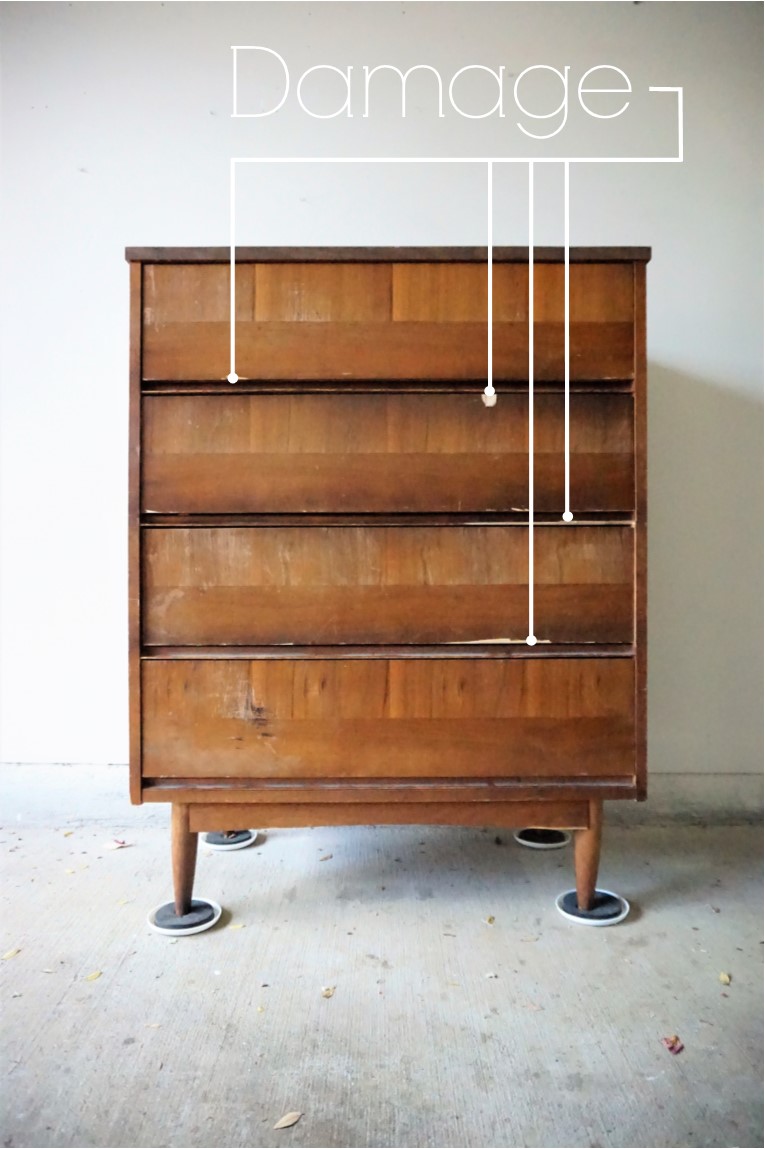
There's just a few little problems...

 
Damage 2.jpg
 

And one big one.

See what I mean? Gasp!  There's a huge chunk missing from the decorative trim molding.  

Up until this point in my furniture refinishing career, I have only re-attached existing splintered pieces.  I've never conjured missing pieces of a dresser before.  I mean do I whittle it?  Cut the whole section of molding out and replace it with as close a match as I can find?  No my friends.  I am here to tell you today - there is another way.  And all you need is a few items from the hardware store:

A can of minwax wood filler with hardening agent
A wood shaver
A plastic putty knife
Scrap wood
screws
Some sandpaper

After watching a couple helpful videos, I learned that step one is to attach a piece of scrap wood underneath the damaged area with a few screws.

Following the instructions on the Minwax can, I mixed the wood putty with the hardener and applied it quickly to the effected area.

And I applied some to the chips in the veneer on the drawers while I was at it.

After letting it set, I gingerly detached the scrap wood - first by unscrewing it from the dresser, then by cutting away the excess hardened wood filler.

Now comes the fun part - sanding the hardened wood to match the contours on the molding as close as possible.

To get those clean lines, I used a wood shaver on the bottom until the wood filler felt flush with the underside of the drawer frame.

And also on the front edge since sanding would have rounded the edges too much.

After that, it was a matter of sanding the entire body of the piece to prep for paint.

And sanding the drawers to smooth out the repaired areas of the veneer too.

Now it's time to paint.  

Can you spot the repair?

How about now?

Once painted, the damaged areas are virtually undetectable!

I am so pleased to find that such a seemingly "big" problem can be fixed by such a small can of wood filler!

I hope this little tutorial saves a dresser or two from the dump.  And if you end up giving this repair method a try, feel free to share your experience with us!

P.S. Read more about this dresser's transformation on Apartment Therapy!

Brass Finger-Pull Dresser || Flip List Item No.2 ||

Happy Labor Day style mutts!  As you may have seen in our posts last week, we've had some exciting news to share - including my debut DIY post on Apartment Therapy.  This little dresser was in desperate need of some MAJOR repairs, but it it ended up being the perfect dresser for the next item on my 2017 Furniture Flip Bucket List.  


The Before


Now because this poor little dresser had so much damage (which I will go into more here on Wednesday), after all the repairs - I really had no choice but to paint.

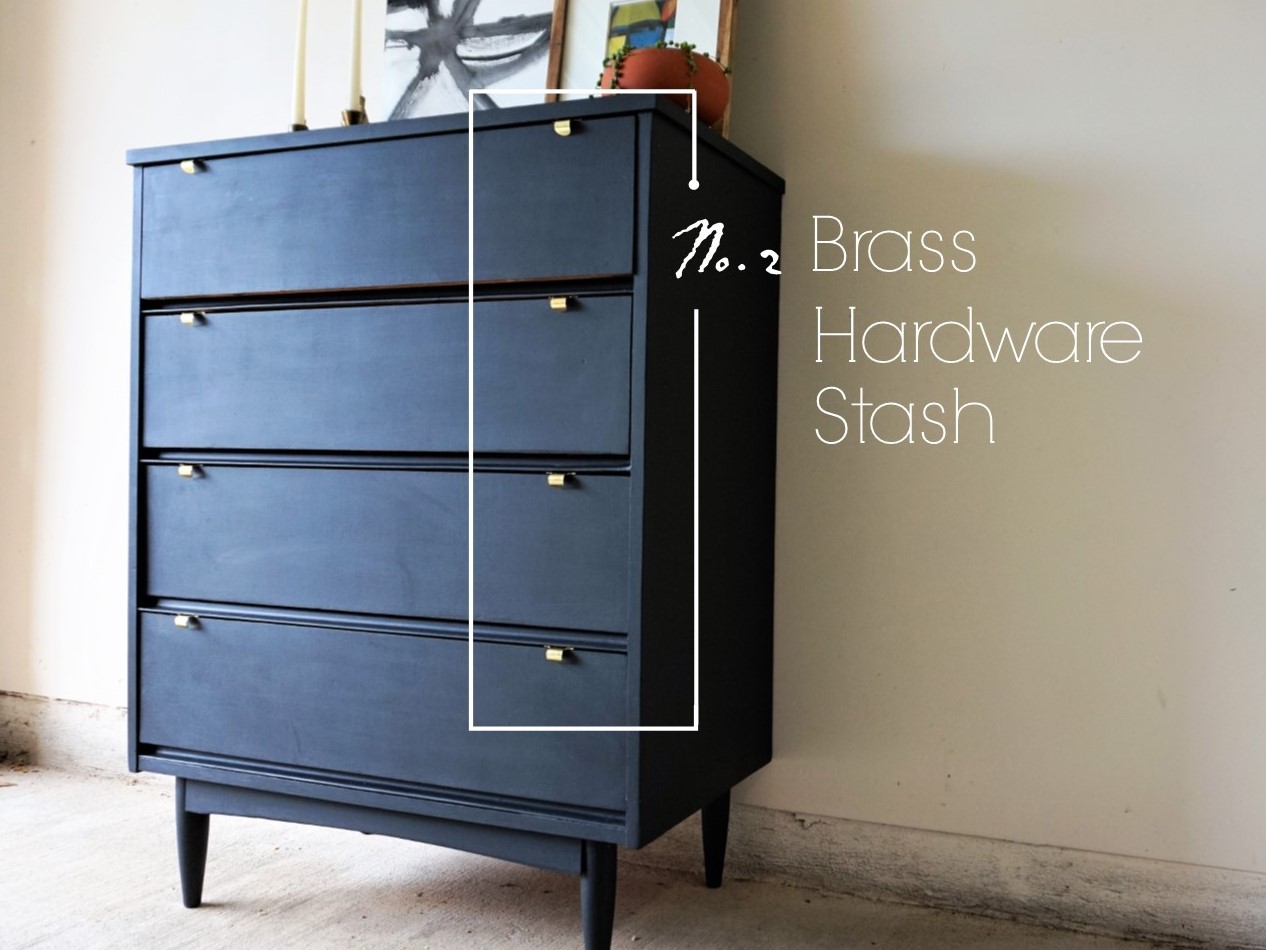
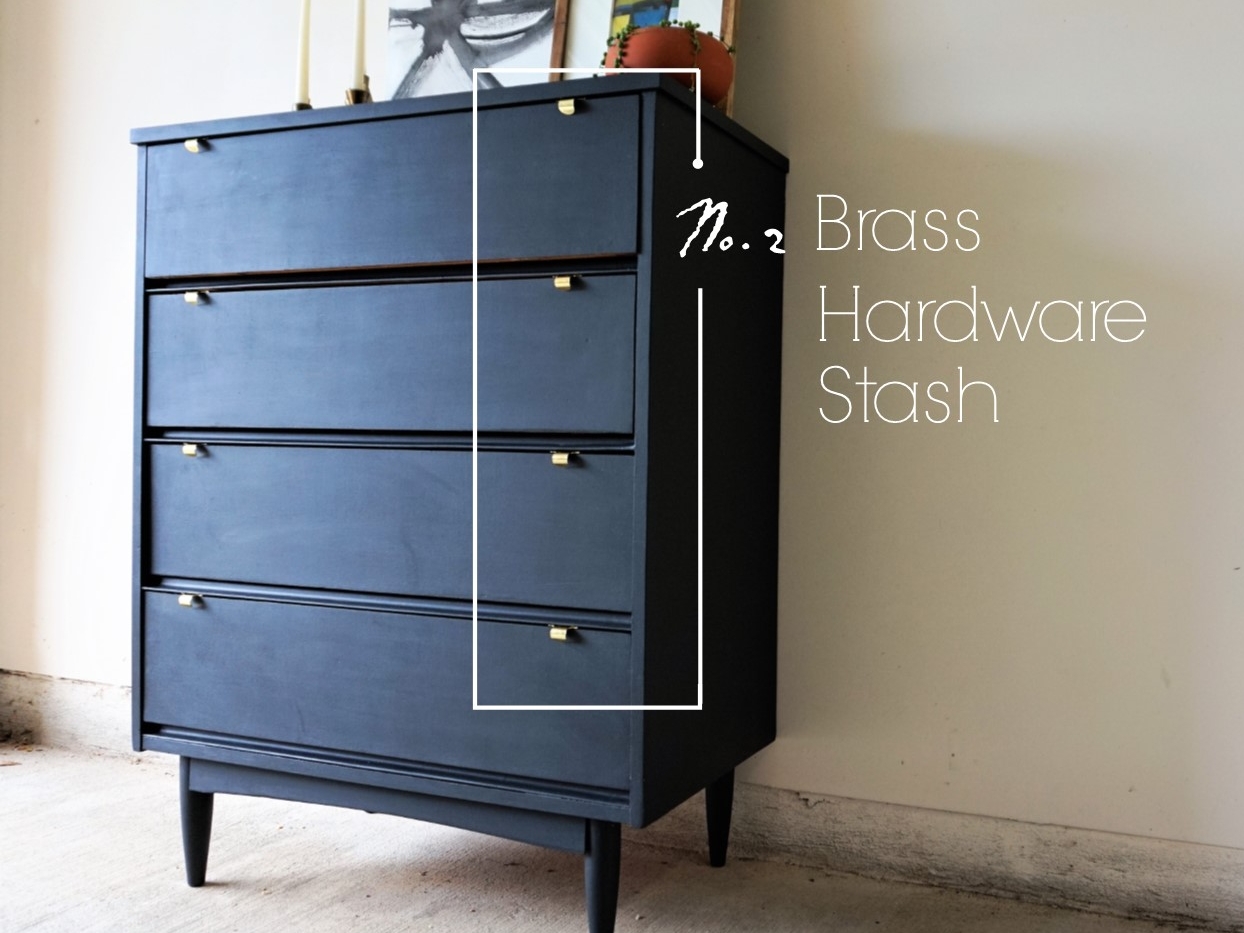
I resurrected my new fave color of choice: Black Boudoir by Behr Paint (same color I used on this two-toned flip in the spring).  Once the paint dried, it was time for hardware - and as you may know, I have been stockpiling this brass hardware since over a year ago.  Although these are designed to be library-like pulls mounted on the front of a drawer, I had other plans for these bad boys...

I wanted to figure out if I could mount them upside-down to the top of the drawers and make my own finger pulls like the hardware on Chelsea's christmastime flip from last year.

Because of the narrow gap between the drawers and the decorative trim, I needed something with a lower profile than a traditional screw to attach the hardware - so I went with brass tacks.

Tacks aren't designed to withstand a hit from a hammer, so I used a rubber mallet to tap in each tack gently.  And...

It worked!

I had just enough clearance for the hardware!  The end result - a handsome double-breasted gent of a dresser.

Don't forget to circle back here come Wednesday for more details on how I rebuilt some of the dresser's splintered trim FROM SCRATCH (and a tutorial so you can do it too ;).

Brass Finger-Pull Dresser
Now Available for Sale
34"L x 18"W x 44"H
$495

If you are interested in this piece or a custom order like it, please contact me at cate@stylemutthome.com.

Five down, two to go.  Catch up on the 2017 Furniture Flip Bucket List.