Reader Design: Erin's Fresh Space

We're off to Pittsburgh today, mutts! A great, interesting East Coast city that's especially great (or so I hear) during football season. Erin's fresh and ecletic home, though, is perfect in any season. 

IMG_6792.jpg
 
IMG_6795 (2).jpg
 

This place is chalk full of unique and interesting finds. The closet home I've seen like Erin's is an Airbnb I stayed in in London earlier this year that had artwork of actual human skulls...  you know your home is different and interesting when you're on THAT level. Erin's design inclinations may be due to her inherent taste, her attraction to rare things, and perhaps, something as simple as geography.

Well, I was born and raised in South Carolina, and I spent 6 years in Manhattan on the Upper East Side, so I like to think my style is combination of those regional elements— the laid-back, classic comfort of the south sprinkled with the refined glam of New York City.
IMG_4095.jpg
IMG_6785.jpg
 
IMG_6784.jpg
 

You'll probably quickly note that Erin's home doesn't have many traces of trendiness; she does a great job of staying true to her tastes, using trendy elements sparingly. 

There are definitely trends that I have gone ga-ga over, and it is hard to refrain sometimes. I fell prey to a chevron duvet a few years ago, which still makes me cringe a little looking back! It’s one of the oldest design mantras in the book, but I think the key is using in moderation, and keeping the super trendy things limited to throw pillows or artwork, items that can be easily (and inexpensively) changed out later if you decide you are tired of it or the trend has passed.

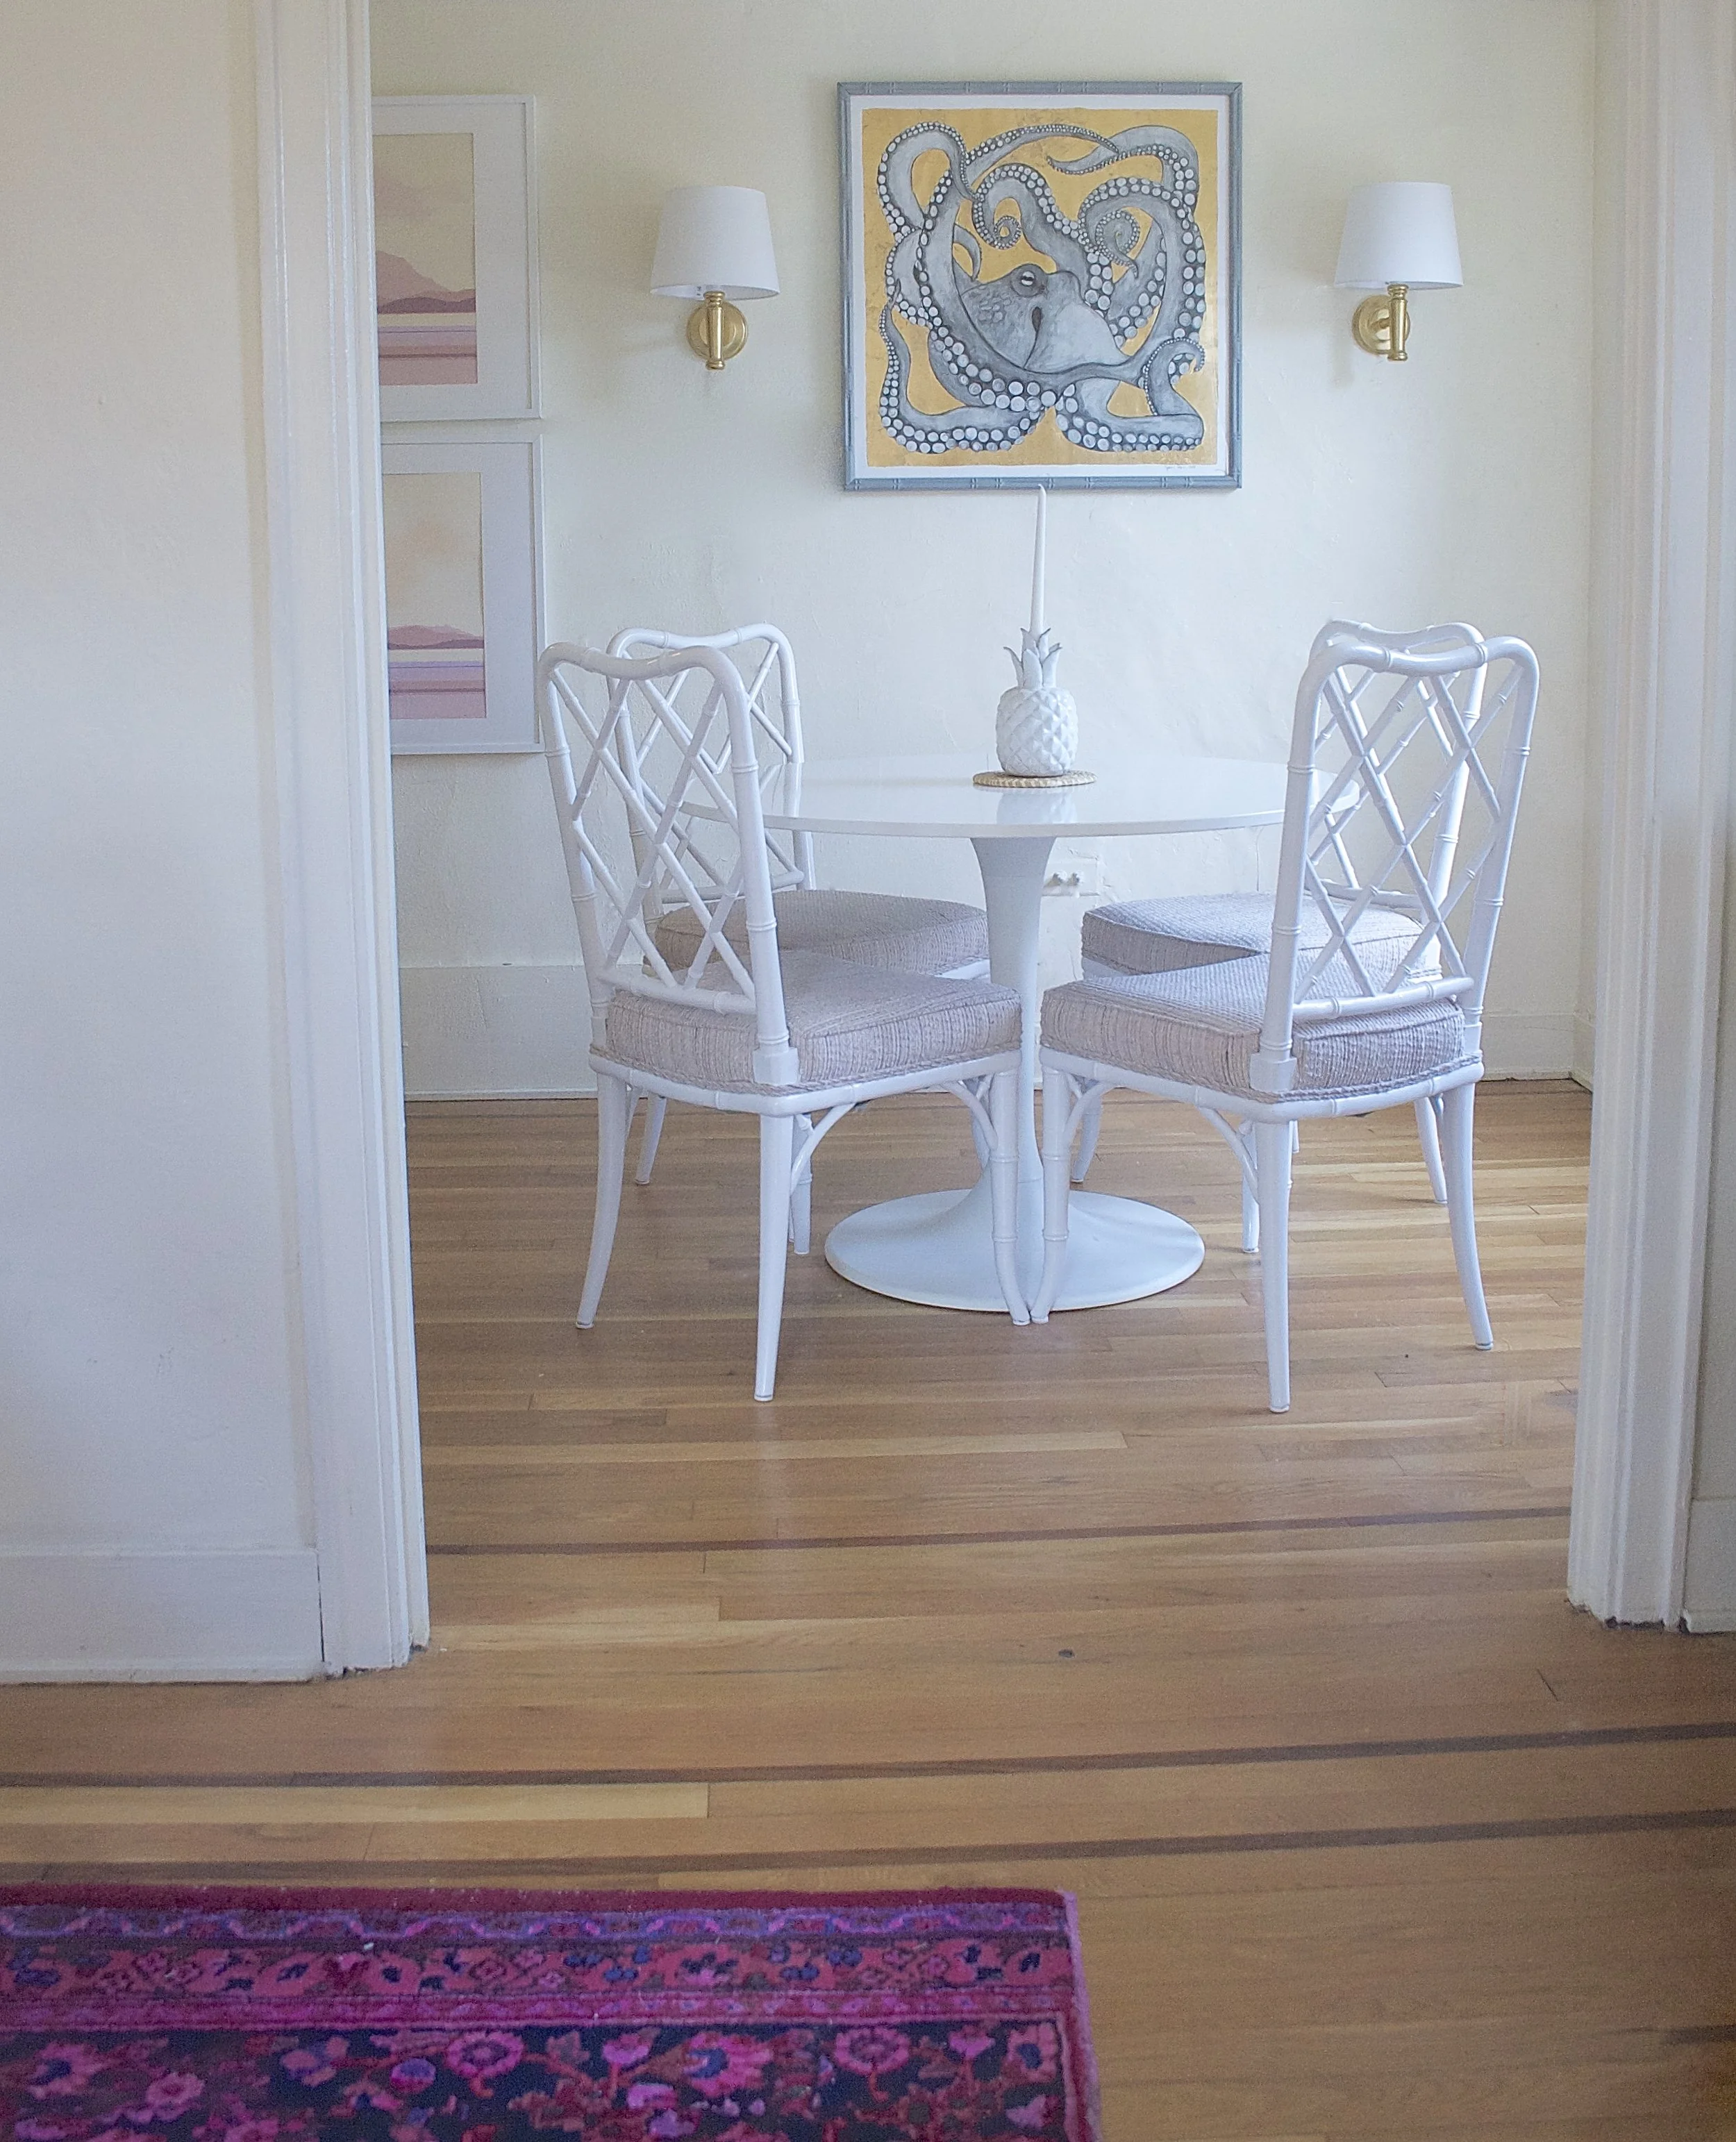
Reeling yourself in and only keeping trendy elements to ones that are easy to swap out later is truly easier said than done, but Erin, you make it look easy - and the trends Erin does select, like over-saturated rugs and a pedestal table, still look timeless and functional. In addition to being unique, Erin values comfort just as much.

You know when you see pictures of beautiful rooms that stop you in your tracks and think - “Wow, that is so stunning! But I don’t feel like I could sit on any of that furniture!” I want it to feel the exact opposite of that.
IMG_3789.jpg
IMG_3492.jpg
IMG_2976.jpg

Every choice in Erin's home seems to just invite you in - either physically, saying 'take a seat,' or emotionally, inviting you to ask a question or dive deeper into the story. 

In the bedroom, one of Erin's favorite pieces is the framed art above the bed, which is actually a vintage Hermes scarf. 

I love the nautical theme & pastel colors (I grew up sailing). I based my entire NYC studio design around it when I lived there, and later our master bedroom when I got married. Luckily my husband isn’t too picky about the pink!

Erin, your home is special indeed. Thanks for the tour! Follow Erin along on Instagram at @mediumalistdesign.

See you next week!

McKenna Sig.jpg

DIY (aka Frankensteined) Chandelier || Flip List Item No.3 ||

Happy Halloween Style Mutts!  As you may well know that this summer, I made lofty promises that I would soon be posting a BIG REVEAL of my 2016 Furniture Flip Bucket List item No.3...   Well, the end of October may not classify as "soon" exactly but what better day for a reveal of a frankensteined chandelier than all hallows eve?

IMG_5137.JPG

God must've had a good chuckle when I ended my post back in July with "I'm still working on the wiring for the sputnik chandelier and [if all goes well] will be sharing the results soon!"  Unbeknownst to me, He obviously knew I was in for a wild electrical wiring ride, a puzzle of a mounting mechanism, and a treacherous install while balancing on the back of our couch.

Before we continue, let's pause for the obligatory disclaimer: I am not an electrician.  I built, wired, and installed this light fixture at my own risk.  If you are interested in building, wiring, or installing your own light fixture - please do EXTENSIVE research before you lift a finger and consult a professional electrician.

We good?  We good.  

Ok so this project started when I found an old foyer lantern in August 2015.  The bulb apparatus inside was so cool!  The staggered lengths.  The brass finish.  I harvested what looked useful and repurposed the glass shell as an umbrella stand.  Now that I had the arms for a sputnik light, I needed to find a body.  I was considering building an angular wooden skeleton that I could route wires through until I found a quirky mid-century modern table lamp for a whopping $15.


The lamp's hollow brass square rod was perfect!  I officially had what I needed to build the frame.

And in case you're wondering, the rest of the table lamp didn't go to waste either.  It became a plant stand:

Making the complete family tree as such:

IMG_5136.JPG

So at this point, I'm staring at the light-less frame of what could be a really cool chandelier after over a year of planning and I. Am. Stuck.

First off, the hollow cavity in the brass rod I took from the MCM lamp was very very narrow.  I tried splicing the existing wires from the foyer light bulbs and running those up through the rod.  When I finally hooked it up to a plug in socket to test it, only half of the bulbs were working.  

We need more power Igor!


Ruling out a dead light bulb or two, I had to disassemble the entire thing and start from scratch.  After consulting a professional at the Lamp Factory Outlet in Fairfax, Va, I learned that I needed to buy a new sockets for the faulty foyer bulb arms.  They were so cheap (like $2 each) that I order a new one for each of the arms (just to be safe) and picked up some new 16 gauge stranded copper wire from home depot.  I bought the wire in both black and white so I could keep my hot (black) and neutral (white) connections straight for when it came time to install.  


When I was researching all these issues, I found this tutorial by ModFruGal to be very thorough and helpful.  Plus - they have a shopping list if you a building a brass arm chandelier from scratch instead of going all Dr. Frankenstein on some poor lamp parts.


Once got all the sockets working and threaded the 8 wires (one black and one white per socket) through the center piece, I then had to conjure up a way to cap the center cavity with a chandelier ring to attach the chain to.  When working with your standard light, a chandelier ring would simple screw in to the top of your fixture.  But this was not standard light and I had to figure out how to secure a round peg in a square hole.  Now here is where I MUST reemphasize to not do this at home without consulting a professional first...

I glued it on.  I know - not the best solution.  I tried metal epoxy and couldn't get a strong enough connection for it to set.  I ended up straight up gorilla gluing it.  And it's working great so far.


Ok.  So now I have a fully wired brass lamp frame (we did it Igor!) but still have to figure out how to install it.  Caleb and I are still renting so whatever we did, it had to be reversible.  Luckily Home Depot has an awesome recessed can light conversion kit by Westinghouse and our apartment has a can light directly above our dining room table.  The kit was really easy to install thanks to a handy step-by-step video.  

Source: Home Depot

Source: Home Depot

This is where it gets a little hairy to explain.  Not everyone will have the unique problems that I encountered  in my non-standard chandelier install, so for your sake, I'll spare you the details.  But you can always email me for more troubleshooting deets if you are somehow in a similar pickle.

Even with all my planning and sketching, I didn't have a solid plan for the mounting plate.  Luckily I don't often throw things away and I still have the leftovers from the original foyer lantern that started this whole thing.  Inside the lantern was a round plate with four holes for each arm and one in the center.  

I only needed the hole in the center to thread the wires through the chandelier loop at the other end of the chain.  But the extra holes did end up coming in handy. They allowed me to screw the mounting plate onto to the brace assembly from the can converter kit,  After it was secure and I could pull my screwdriver out, I capped the four extra holes with some threaded nipples, a few nuts, and four brass finishing caps,

Ok.  Enough tech talk.  Let's get to the juicy reveal already!!!

In all my mad-sciencing, I didn't think to account for the balance of the varied brass arms.  

But I don't even mind that he doesn't hang straight - it gives him an angular mid-mod playful vibe.  And hey - Frankenstein's monster wasn't perfect either.  He could only say yaaaaaaaaaaaaaaaaaaaaaarp after all.

Alright Igor - flip ze switch!

DSC_0254-001.JPG
IMG_5130.JPG
IMG_5131.JPG

So all in all this project was a monster to gather, a monster to build, and a downright monster to install!  But when it was all said and done, I still only spent a little over $100 on this project.  Although that's a little higher than I like to spend for pieces in our own home, this was still a winner in my book compared to buying new.

Stay safe trick -or-treating out there tonight friends!  And if you need something to binge read while you're raiding your candy haul, catch up on the other completed furniture flip bucket list items:

Modern Bar Table ||and treat yo self to a Giveway!||

One of my favorite parts about furniture flipping is finding something that could be cool - even if I don't know how exactly.  I've mentioned it before, but I often run through a checklist when I'm debating a new potential project at the thrift store: 1) Is it cheap?  2) Does it have good bones?  and 3) Can I make it cute?  When I found this chrome and laminate table, it hit points 1 & 2, but I was a little fuzzy on 3.  

Photo May 27, 10 35 22 AM.jpg

I thought at first it should be transformed into a glamorous marble and gold console table.  But it was a little too short to be a suitable console and I wasn't really loving the cost of two custom-cut marble slabs.  But this is where it's handy having a partner in the biz.  I bounced some ideas off of Chelsea and was inspired to start simple and see if I liked where the project was heading before investing an exorbitant amount of time, money, and energy into it.

I took a long look at it again and realized this petite table might not be the best height for and entryway piece, but the unique gaps between the chrome trim and the flat surface of the top shelf made for some handy handles...

I replaced the bowing fake parquet with white melamine for a more modern look.

The porcelain pyramids are a Sweet Clover Barn find from their May sale weekend.  Chelsea and I braved the rain and mud and were rewarded with all the goodies.  Guys, if you're anywhere REMOTELY near the DC area, you should plan a day out to Frederick, MD for one of their sale weekends and capitalize on the best barn deals around my friends.  

You heard it here first ;)

image.jpg

I've been a little obsessed with brass lately, but something about the bright reflection of the chrome [can you spot me??] made me reconsider applying a faux gold finish.  Chelsea advised me to finish the table without painting the chrome to see if I liked it as-is.  And BOY am I glad I listened to her.  I never thought I would like to look of chrome so much!

This time of year Chelsea and I have a lot to celebrate: my birthday falls and the end of May with Chelsea's bday and anniversary right behind in early June.  Being the party people that we are, we thought we'd extend the invitation to you all and invite you to also

Treat. Yo. Self. 

To a StyleMutt Giveaway that is!!!  In the spirit of celebration, we are giving this wall hanging to one lucky winner.  Handmade by yours truly, this wall art is made from a swatch of Milton & King wallpaper, some vinyl letters, and white spray paint.  Their array of patterns is so diverse and downright juicy that it was difficult to pick just one.  But I stumbled on a sinful yet playful pattern named Gluttony and thought the Parks & Rec quote was too perfect.  [That little framed art print is also a swatch of the same wall paper].

To enter, comment below with what you would most like to treat yourself to today and find us on Instagram [@chelsea_stylemutthome and @cate_stylemutthome] for more ways to enter.  US/ Canada residents only. Winner will be announced next week!

And if you're in the DC Metro area, this smashing bar table is now available for sale ;)

Modern Chrome Bar Table
41"W x 17"D x 26.5"H
SOLD
$145

If you are interested in this piece or a custom order like it, please contact me at cate@stylemutthome.com.