Boys' Room Reveal + A Stencil Giveaway!

A stenciled room makeover - again!

After 8 months since my first stenciled room makeover, (which was followed by another a month later at my grandparents' assisted living home), it was only a matter of time before using Cutting Edge Stencils to transform another room in our house!

Colin and Mason's room!

After bunking the beds we had an entire wall to play with. My hope for this room was that it be a fun, open space where our imaginative wild things could let loose and be themselves. And like most wild things, they love being in their natural habitat where they're simply free to be. Our house backs into woods filled with all sorts of wildlife, and the kids enjoy finding interesting things back there every day. The Birch Forest stencil just seemed too perfect for bringing a bit of the carefree outdoors in!

As with the previous walls I've stenciled, this was a piece of cake! Cutting Edge Stencil's sheets are 26" x 48", which makes rolling the pattern on super easy! I blue tape the corners and edge of the stencil in place, use a foam roller, (with a bit of paint, not too much or it cakes inside the small details of the stencil), and roll the paint on in a matter of seconds. When finished with one area, I lay the roller down on the paint tray, gently peel off the stencil sheet, and line it up in the next spot.

Here is a quick tutorial video from CES that shows these steps in action!


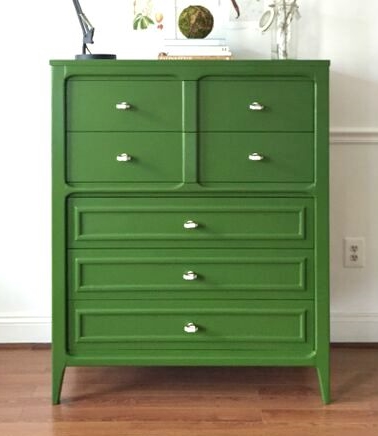
This stencil is really the only major thing going on in the room! I considered a few different options for toy storage, but when this petite mid-century cabinet turned up at a yard sale for $30, I decided to reuse the guys' bookshelves which were previously painted blue, to flank the little piece. I love these pieces as a unit and it's exactly the right amount of room for their toys and books.

The funny little LED lights are exactly like the clip-on lights we have in our master bedroom. I found them at Lowes and sprayed them gold, (just like I did to ours). They don't ask for a lot of attention in the room which is just what I was looking for. :)

With so much going on on the opposite wall, I wanted to keep the beds simple. White comforters and homemade quilts from the boys' Nana, (my sweet Mother-In-Law), do the trick just fine. I also hung wire file baskets on the walls for bedside books, and hung simple reading lights, (both from Target), so my guys can have some quiet reading time at the beginning and end of the day. Our Colin's reading light goes on long before the sun comes up - I LOVE that he has this space to quietly read and play before getting ready for the day. It fills my heart to see this room getting loved and used so well.

Mr. Fox here came from H&M and I swear I catch him winking now and then. Such a sly guy. I found him in store on super sale for $5! I've looked for him online with no luck, but this guy is available, as well as his friends, Owl and Wolf. Love how these gorgeous pillows double as art!

This mid-century wicker chair is by far my best freebie find yet! I saw it sitting outside a thrift store with a modest price tag of $10, (!!!), but when I went inside to pay they told me I had accumulated enough customer loyalty points to take a piece for free!

Life is so much more fun with pattern, isn't it?!

If you agree then we've got a huge treat for ya! The ridiculously gracious team at Cutting Edge Stencils has offered to give another one of our readers a complimentary stencil of their choice! Last Spring we partnered together to give away a stencil, and our lucky winner, Julie, did this with her prize:

It's amazing what a little bit of pattern can do. You can turn any ordinary piece of furniture, or an entire room, into something extraordinary! We are completely smitten with Julie's use of pattern here and it's a great reminder that even if you're not into an allover wall pattern, there are still impactful projects you can do with a stencil!

1. Check out Cutting Edge Stencils and pick a favorite pattern
2. Leave a comment below with the name of your favorite stencil
3. That's it! For bonus entries you can like their Facebook page and follow their blog.

We'll take entries until Thursday, October 1 at 12 noon EST. We can't wait to see which patterns catch your eye!

Thank you all so much for stopping by!
 

Small Business Showcase: Christy

This week marks our 1 year anniversary as StyleMutt Home!  How did that happen?  Seriously.  It went by so so fast.  365 days ago, when Chelsea and I first sat down to strategize about what we wanted for our little slice of eAuthorship, one of the main things we wanted to make our site about is supporting and advertising fellow small businesses.  And what better way to support our DIY community than to introduce you lovely readers to a fellow local furniture flipper.  Christy is a HS science teacher who's been excersizing her creative side by making decor magic in Falls Church, VA.  We've invited her to share about some of her pieces that are currently for sale in the DC metro area:

Handsome Desk

Door-Turned-Mudroom

From Christy:

Wednesday night is trash night in my neighborhood. And every once in a while my husband and I will make a date night of driving around looking for new projects.  This desk didn’t disappoint!!  
The top of the dresser had peeling veneer and the whole thing was stained a dark color straight out of the 80’s.  
The top was a bit tough, having to fill in some missing veneer holes with wood filler.  When my sander exposed some really cool grain, I tried to figure out how to show that off, and decided keeping the legs and drawers raw (but protected with some wax) would be really neat against a dark grey paint. 

How cute is that cubby?!?

I was excited to dress up the cubby with some cool paper (any excuse to get fancy papers!), and I think that the vine detail on the handles adds a classy bit of whimsy.  This thing is solid wood, and I can imagine will last for years to come!
Last June (2014) I visited a sweet gem of a place for the first time where items from gutted houses are brought there for resale.  This orange door caught my eye, and I dragged it home to sit in our apartment and await inspiration.  I knew I wanted it to become some sort of mudroom entry piece, but was struggling to decide what to put in the empty panes.
And so it sat, for one entire year.  I had only been married for a couple months at that point, and we were learning to blend our lives in an apartment small enough it requires only one plug to reach every corner with your vacuum.  So of course, the only place the door would fit meant we were within 15 feet of it at any time, trying to pretend it matched perfectly with the grey wall behind.  My husband learned patience.  I learned I have a focus problem as other projects floated in and out of our house.  But finally a vision came! And it was time to get to work.

Been there Christy, been there [just ask Caleb].  ;)

I didn’t anticipate all the layers of paint love that had been put on that door.  A couple hours of scraping turned into quite a few more hours when my sander didn’t have the gumption I had hoped it would.  But after it got to an acceptable level, I threw on some grey chalk paint before the white to add some variation when sanding.
The trickiest part was cutting the chevron board pattern – beadboard proved to be the perfect way to create the effect, and (with the help of my dad and his circular saw) I got to nerd out with a protractor and metal ruler! Geometry class for the win!
The stain was created by mixing both grey and brown stain.  I was really excited when both tones showed up on the wood!  And my heart loves the little detail of the brass key hole!  I have to admit that this is one of my favorite projects I’ve made. I debated keeping it, but as I truly have no space for it, I’m excited for it to become someone else’s favorite! 

Dimensions: 31.75"W x 7.5"D x 79.25"H

Thank you Christy for sharing your many many talents with us and for being our first local showcase!  Show her some love in the comments will you?  If you are in or around Washington, DC and are interested in either of these pieces or a custom order like it, email Christy for more info and pricing!

And if you are also interested in also promoting your business to the StyleMutt community, then by all means let's chat about how to partner up!

And hey!  To celebrate our 1st anniversary, we're doing a tray giveaway on Instagram!  Check it out and enter to win by 12 noon today to be eligible.