Hi All! Grab a cuppa and get comfortable; it's the post you didn't know you've been waiting for. Cate and I are pretty darn excited to be sharing our love for leather here during this magical time of year. Leather is kind of a big deal around here. Among all the nitty gritty logistical details of starting up our cozy design resource business, leather was right up there as one of the first topics we knew we wanted to cover - not just thoroughly, but annually! And not just by ourselves, but with guests! Because no leather party is fun to attend alone. (I'm assuming. Can anyone out there attest? Anyone?)
So it's a funny little dream of ours to hit hard with leather every year. Don't question the dream, it just is. Who's on board? We want to know what you've done with leather in your home. The sky is the limit! We're looking for people to share their leather projects here so if you've got one, send it along to admin@stylemutthome.com or tag #StyleMuttsLoveLeather on Facebook or Instagram!
I've got the sweet pleasure of kicking things off today with some budget friendly belt projects! Cate will be stopping in next week with a leather project of her own that she's recently whipped up, so stay tuned!
Anyways, belts! Use what you have or find these thrifted beauties for pocket change. Belts are such a cost effective way of adding a snap of leather to your decor, and I'm excited to share three uses I've enjoyed trying for my own home. These are listed in order of most difficult to least. And the most difficult one is only because you have to pull out a drill. Big whoop - it's still a piece of cake!
1. Update hardware on an existing piece of furniture with leather tab pulls! How? Figure out how many pulls you need, measure your belt, and divide the measurement by how many pulls you need. (Okay, so I forgot about the division when we were discussing the level of difficulty. Hang with me creative arts majors!) Whatever number you get is how long each tab will be. Cut with strong shears or scissors. Then, use your drill to drill a hole through both ends of the tab, (fold the tab in half to do this so the holes are lined up). Finally, affix to your piece with nuts and bolts!
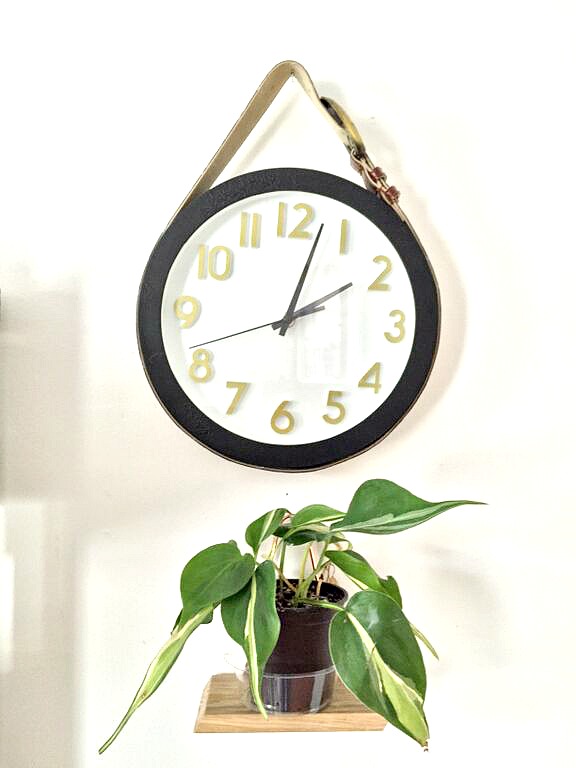
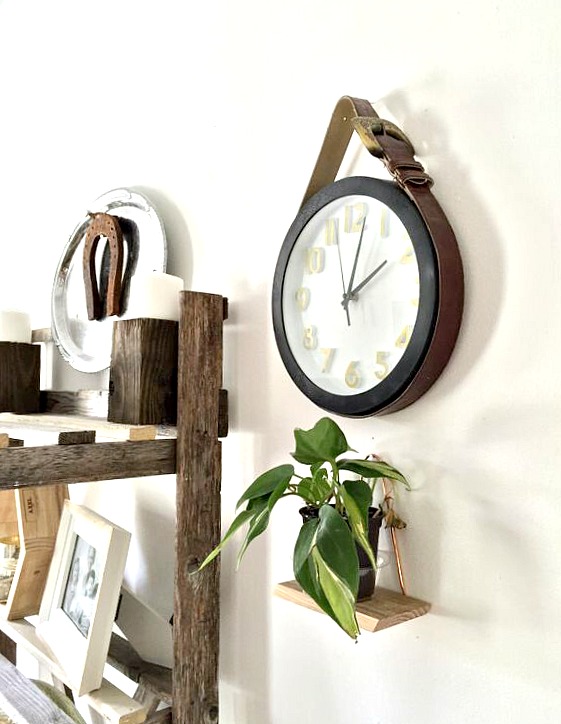
2. Hang a round clock or mirror! So you don't need a power tool for this one, but you do need a hot glue gun. All you do is lay the belt out flat, pretty side down, then squeeze the hot glue directly over the center line of the belt as you roll the clock on right over the glue. Make sure you leave enough belt loose to hang your new updated piece by!
3. Belt a pillow. No dangerous power tools, no scalding hot glue, this one is about as lazy as it gets, folks; my favorite kind of DIY! I tried this a few years back when we were celebrating our first Christmas in our home. We'd spent what we could on used, thrifted furniture for our house. By the time the holidays were rolling around I tried to think hard of how to get our home festive using what we had. I wrapped some floral pillows in plaid blankets and belted our white ones, shown here, in a few of my own belts. It's such a subtle touch but it's just enough to make magic happen.
Now it's your turn! We want ALLLL the leather projects you've got to share. Don't forget, tag #StyleMuttsLoveLeather on Facebook or Instagram, or send them to admin@stylemutthome.com. This isn't so we can 'Ooh' and 'Aah' for our own sake, (naturally we'll be doing that anyway since it's our second language) - this is to share here and spread that inspiration around! We will credit every project back to you here and our social media channels.
Thank you all so much for stopping by! Can't wait to see what you come up with!


